Tuning Large Windows DHCP Servers

I’ve been involved in setting up some very large Windows DHCP deployments during my time working as a Consultant at Long View Systems. Along the way I’ve found some interesting challenges and caveats of using Windows DHCP, especially so anytime your working with DHCP enabled dynamic DNS updates. I wanted to have a quick post about this for my own reference and hopefully might come in handy for others as well.

  • DHCP Failover Scopes
  • Administration Overhead
  • DhcpLogFilesMaxSize
  • DynamicDNSQueueLength
  • DnsRegistrationMaxRetries

DHCP Failover Scopes

I’ve covered this topic extensively in my Windows Server 2012 R2 – DHCP High Availability / Fail-over Setup Guide series. Basically, if you are deploying Windows DHCP on a 2012+ server then you should be using DHCP Failover (not to be confused with split-scope or ms-clustering).

Administration Overhead

If you’re working with more than 100 scopes using only the default DHCP MMC-snap in’s, you’re gonna have a bad time.

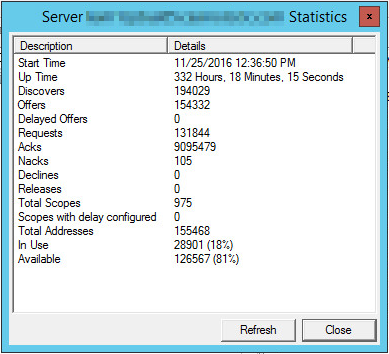
Almost 1,000 DHCP scopes, 150k+ IP addresses

Performing administration tasks in the console with a large number of scopes becomes very repetitive and time consuming as each task normally requires many clicks. Making mass-changes is also very difficult or next to impossible. You may find yourself becoming familiar with Powershell scripting to resolve this problem. The DHCP Server Cmdlets in Windows PowerShell are very easy to use and Microsoft has great documentation on this. I found myself making Powershell scripts to make mass-changes much easier and less vulnerable to human error due to the very repetitive nature of the default GUI. Continue reading…

Firewall Swap & Windows Telemetry Data

I recently switched over from Sophos UTM to Untangle NG for my personal use firewall at home. During the process I basically had to rebuild all of my firewall rules and general network policy configurations. This allowed to me “start fresh” as my previous configuration had gotten quite bloated and complicated over time.

It’s clear that Microsoft has no intentions of telling us what exactly is sent in this telemetry data, how long it’s stored, and why when it’s disabled it continues to send data. Not to mention which obvious third parties have access to the data. For this reason, part of the new network policies I wanted to include was blocking telemetry data from getting sent back to the Microsoft mother-ship. Continue reading…

Windows Server 2016 – Technical Preview 5

Install

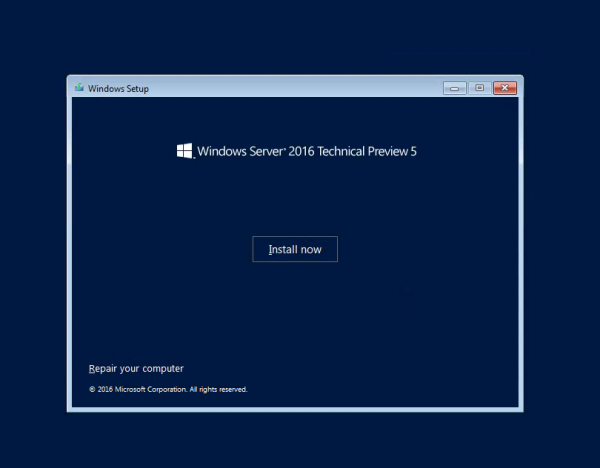
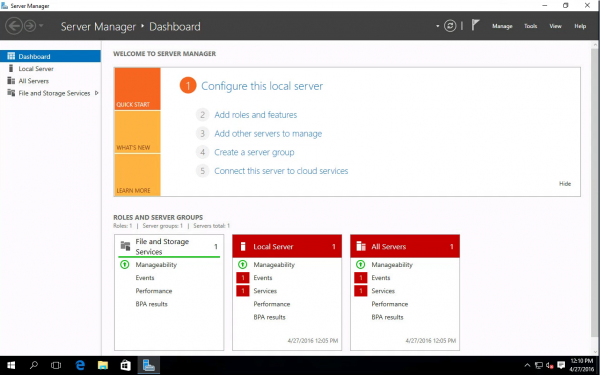
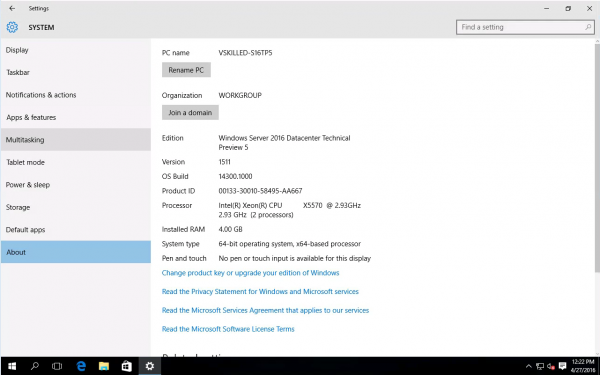
Microsoft has released Windows Server 2016 Technical Preview 5 (build #14300). You can see what’s new here. This could probably be one of the last few TP (tech preview) builds that we will see. Especially so if Microsoft is still firm on their plans to officially launch Windows Server 2016 this summer (Q3 2016).

As long as you are running VMware ESXi 5.5 or higher (6.0 or later is recommended) then Windows Server 2016 is an supported operating system on VMware. You can even select it as an option for the guest OS on virtual machine version 11 or higher. Keep in mind that VMware VM version 11 restricts you to using the web client ONLY. When moving from a previous version of Windows Server to Windows Server 2016 Technical Preview 5, you will need to uninstall the previous version for a clean installation of Technical Preview 5. You can download TP5 as an ISO, however Nano server is only available in VHD format. See Getting Started with Nano Server for full details.

Personally I was never a fan of Windows 8.x or Server 2012. So far I think that Windows Server 2016 is already step in a better direction. Even in technical preview it offers many improvements of it’s predecessor. Windows Server 2016 Technical Preview 5 provides a wide range of new and enhanced features and capabilities spanning server virtualization, storage, software-defined networking, server management and automation, web and application platform, access and information protection, virtual desktop infrastructure, and more. The GUI version or what is now referred to by Microsoft as the “Desktop Experience” is my current de-facto standard. If you use or have seen Windows 10 then right out of the box you will notice that Server 2016 is a stripped down, optimized, server version of Windows 10.

Choose Standard or Datacenter edition, depending on the features you need:

  • Windows Server 2016 Standard
    • Up to 2 VM’s or Hyper-V containers
    • Unlimited Windows containers
    • New Nano Server deployment option for “just enough OS”
  • Windows Server 2016 Datacenter
    • Unlimited VM’s and Hyper-V containers
    • Unlimited Windows containers
    • New Nano Server deployment option for “just enough OS”
    • Shielded VM’s and Host Guardian Service
    • Storage features, including Storage Spaces Direct and Storage Replica
    • New networking stack

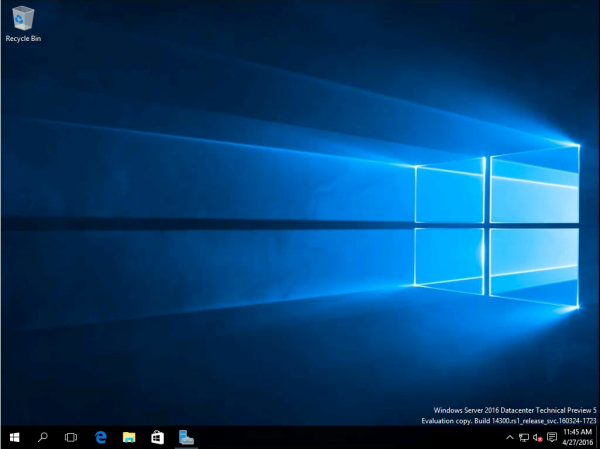
Windows Server 2016 Technical Preview 5 Gallery:

Overall Technical Preview 5’s new features seem to be focused on Hyper-V, Networking, Storage, Nano Server and Security. In Server 2016 you will also find Windows Defender and “Windows Server Antimalware” is installed and enabled by default.

The introduction of Host Guardian Service (HGS)’s new feature Shielded Virtual Machines which focuses on the security of virtual machines running in the Hyper-V environment. The goal of shielded VMs and Guarded Fabric is to help provide service providers and cloud operators the ability to offer their tenant administrators a hosted environment where protection of tenant virtual machine data is strengthened against threats from compromised storage, network, and host administrators, as well as malware.

This is just a quick post showcasing the new tech preview build. I will have a more in-depth view of all of these features and more when a release candidate build is finally available.

What do you think of Windows Server 2016 so far? Comment below!

Worried about Windows 10 privacy issues? Group/Local policy to the rescue!

win10privacy

I hear and see all over the Internet that people have privacy concerns about Windows 10 and for good reason. For any security concious person, like myself, they’re probably not very happy about many of the decisions that were made for Windows 10. Microsoft seems to be very tight lipped about their updates and what information is actually shared in their “learning” and “telemetry” information that is sent back to the Microsoft mother ship. There are also many other features included in Windows 10 that are, or could be seen as, a privacy concern; such as the advertising ID, WiFi Sense, Cortana, and the list goes on…

One of the biggest worries, though, is Microsoft’s policy on disclosing or sharing your personal information. The following is an excerpt from the privacy policy:

“We will access, disclose and preserve personal data, including your content (such as the content of your emails, other private communications or files in private folders), when we have a good faith belief that doing so is necessary to protect our customers or enforce the terms governing the use of the services.”

I’m sure many from the IT community are aware of Microsoft’s direct involvement with Government spying programs – so make no mistake, you are being watched. Continue reading…

Microsoft support and security updates for Internet Explorer 8, 9, and 10 end on January 12, 2016

Internet-Explorer-centered-header-664x374

Microsoft has announced that they will no longer provide security updates or technical support for older versions of Internet Explorer. Running older versions of Internet Explorer after January 12, 2016 may expose you to potential risks.

The latest version of Internet Explorer will continue to follow the component policy, which means that it follows the support lifecycle and is supported for as long as the Windows operating system for which it is installed on. Focusing support on the latest version of Internet Explorer for a supported Windows operating system is in line with industry standards.

Most customers are already using the latest version of Internet Explorer for their respective Windows operating system, however we have found there is still fragmentation across the install base which poses problems for web developers and support staff. Microsoft recommends customers upgrade to the latest version of Internet Explorer available in order to experience increased performance, improved security, better backward compatibility, and support for the modern web technologies that power today’s websites and services.

Beginning January 12, 2016, only the most current version of Internet Explorer available for a supported operating system will receive technical support and security updates, as shown in the table below:

Windows Desktop Operating Systems Internet Explorer Version
Windows Vista SP2 Internet Explorer 9
Windows 7 SP1 Internet Explorer 11
Windows 8.1 Update Internet Explorer 11


Windows Server Operating Systems Internet Explorer Version
Windows Server 2008 SP2 Internet Explorer 9
Windows Server 2008 IA64 (Itanium) Internet Explorer 9
Windows Server 2008 R2 SP1 Internet Explorer 11
Windows Server 2008 R2 IA64 (Itanium) Internet Explorer 11
Windows Server 2012 Internet Explorer 10
Windows Server 2012 R2 Internet Explorer 11


Windows Embedded Operating Systems Internet Explorer Version
Windows Embedded for Point of Service (WEPOS) Internet Explorer 7
Windows Embedded Standard 2009 (WES09) Internet Explorer 8
Windows Embedded POSReady 2009 Internet Explorer 8
Windows Embedded Standard 7 Internet Explorer 11
Windows Embedded POSReady 7 Internet Explorer 11
Windows Thin PC Internet Explorer 8
Windows Embedded 8 Standard Internet Explorer 10
Windows 8.1 Industry Update Internet Explorer 11


For customers running on an older version of Internet Explorer, such as Internet Explorer 8 on Windows 7 Service Pack 1 (SP1), Microsoft recommends customers plan to migrate to one of the above supported operating systems and browser combinations by January 12, 2016.

Customers have until January 12, 2016, to upgrade their browser after which time the previous versions of Internet Explorer will reach end of support. End of support means there will be no more security updates, non-security updates, free or paid assisted support options, or online technical content updates.


Sources:


Windows Server 2012 R2 – DHCP High Availability / Fail-over Setup Guide (Part 2)

windows_server_2012

Part 2 – Setup of Windows 2012 R2 DHCP Failover

Click here to go to Part 1

This build will required 2 x Windows 2012 R2 servers. They both must have the DHCP role installed in preparation for the DHCP fail over configuration. I will not cover the installation of the the OS in this guide.

In this guide I simply used two VMware virtual machines in my home lab to accomplish this. The two servers I used are actually my domain controllers as well. In a production environment it would be best to have this as a dedicated role on the servers, depending on the size & requirements of the environment. We will be building a DHCP Hot-Standby cluster.

1 – Server Preparation

  1. Build your two required Win. 2012 R2 servers.  Your servers should configured with an IP address, DNS, domain, etc and should be fully functioning on your network.
  2. Ensure that the DHCP role is installed on both servers. From the Server Manager select the Manage button, and click Add Roles and Features.
    000145_2015-07-06 13_40
  3. Select “Role-based or feature-based installation“. Click Next.
  4. Select your server from the list in the pool. It should reflect your FQDN and IP appropriately, ensure this is correct. Click Next.
  5. From the Roles list, select “DHCP Server“. Another prompt will appear to install the management tools. Click Add Features, then click Next.
  6. Skip to the end of the installer and click Install. The DHCP role will be installed. Repeat this process on the 2nd server.
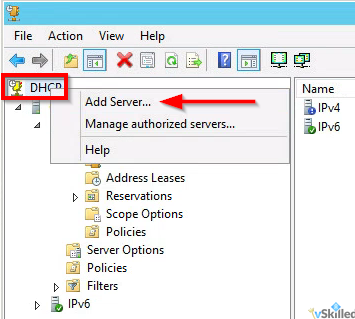
  7. Open the DHCP management utility from the Administrative Tools folder on your primary server. This gives us a view of the DHCP installation on the local server. From the DHCP root menu, right click and select “Add Server” as shown.
    000146_2015-07-06 13_54
  8. Enter the FQDN or IP of your 2nd Win. 2012R2 server and click OK. This will add the second server into the view so that we can manage both servers from here.

2 – Scope Setup

Before we can setup DHCP failover we need at least one DHCP scope configured. This scope should ONLY be configured on the primary DHCP server and MUST NOT be added to the secondary DHCP server.

  1. On your primary server only – Right click on the IPv4 object. Click “New Scope…”. This will add a new IPv4 scope.
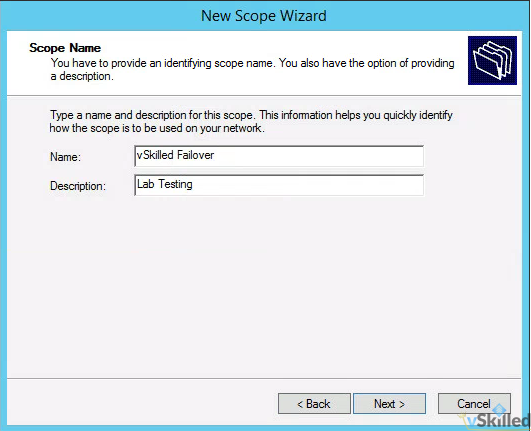
  2. Enter the Name and Description of your DHCP scope. Click Next.
    000147_2015-07-06 14_01
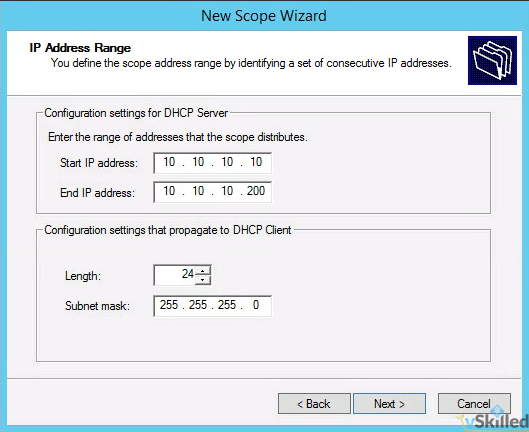
  3. Enter the IP range of the scope as well as the subnet length and mask. The mask should be generated for you based on the length you enter. A /24 would include 254 usable IP’s which is more than sufficient for this test.
    000148_2015-07-06 14_08
  4. You will be promoted for any exclusions or delays. Add if required. Otherwise click next.
  5. Enter the lease duration for the scope. I will leave this at the default of 8 days. Click Next.
  6. Select “Yes, I want to configure these options now“. This will allow us to configure the gateway, DNS servers appropriately so that clients who get an IP address can communicate properly on our network.
  7. On the Router / default gateway page enter the IP address of your router or aggregate switch here. Click Add, then Next.
  8. On the DNS Name and DNS servers page enter the domain of your environment and the DNS servers that you want clients to use. Click Next.
  9. Add a WINS server if you have or need one. (Probably not.) Click Next.
  10. Finally you will be asked to activate the scope now. Select “No, I will activate the scope later“, or you can enable it if you wish. Click Next, then click Finish.

3 – Failover Cluster Configuration / Setup

Now we will configure the DHCP failover cluster on the DHCP scope(s).

  1. Right click on the root IPv4 menu and click “Configure Failover…”.
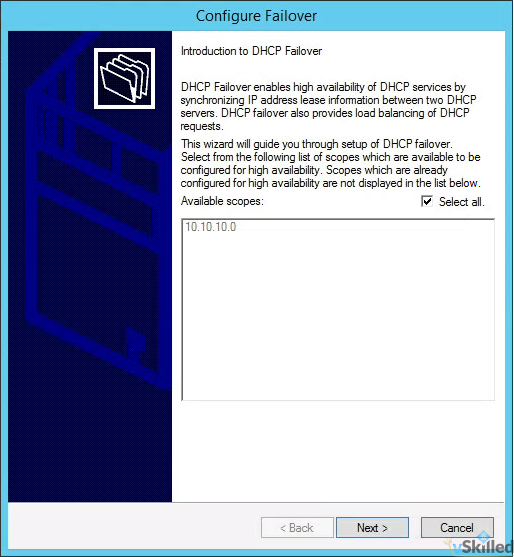
  2. By default “Select all” is selected. If that is okay, you can leave that selected. Otherwise you can manually select the IPv4 scope(s) that you want to have failover enabled on. Click Next.
    000149_2015-07-06 14_22
  3. Enter the FQDN or IP of the secondary DHCP server and click Add Server. Click Next.
  4.  Configure the Failover Relationship options. (Please see below for an explanation of these options!)
    • Relationship Name: <enter a name for your DHCP failover relationship>
    • Max Client Lead Time: 1 hour (default)
    • Mode: Hot-Standby
    • Reserve Addresses %: 5% (default)
    • State Switchover Interval: Checked, 1 hour
    • Enable Message Authentication: Yes
    • Shared Secret: <configure a secure password>
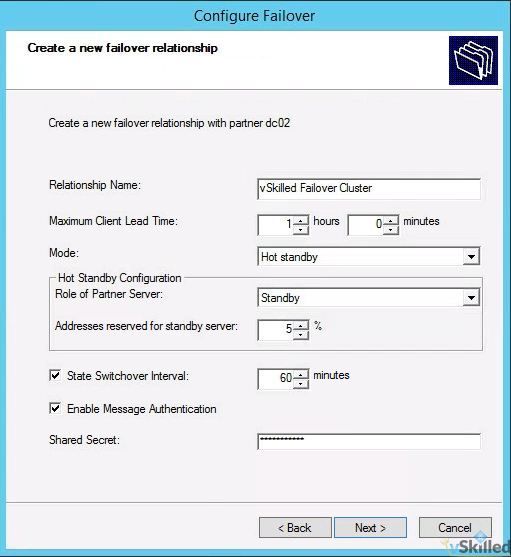
      000150_2015-07-06 14_43
  5. Once you have configured the options to your liking, click Next. A summary screen will appear. Click Finish to create the failover relationship.
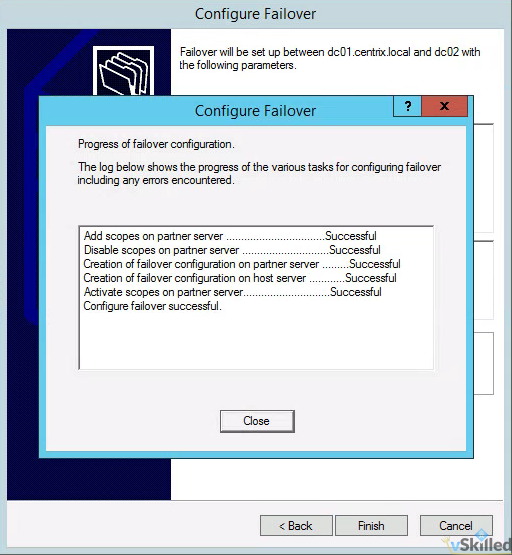
    000151_2015-07-06 14_48
  6. You will get a screen that shows the status of the replication of your scope to the partner/secondary server. Ensure everything shows as “successful” and close the window.
  7. We have now successfully setup a Windows 2012 R2 DHCP  hot-standby fail-over cluster!

Going Deep – Explanation of Windows 2012 DHCP fail-over configuration options

In summary, the State Switchover Interval needs to be configured so that the servers will automatically failover to the standby server without manual administrator intervention. We must also configure the MCTL value so that the partner server can issue temporary leases addresses until the standby server takes full control of the scopes which happens after the State Switchover Time expires and the partner transitions to Partner Down state.

Both DHCP servers in a failover relationship must maintain a persistent TCP connection with each other. DHCP failover partners establish and maintain this connection on port 647, and use it to exchange operational state information and lease information.

State Switchover Interval: If automatic state transition is enabled, a DHCP server in communication interrupted state will automatically transition to partner down state after a defined period of time. This period of time is defined by the state switchover interval. A server that loses communication with a partner server transitions into a communication interrupted state. The loss of communication may be due to a network outage or the partner server may have gone offline. By default, since there is no way for the server to detect the reason for loss of communication with its partner, the server will continue to remain in communication interrupted state until the administrator manually changes the state to partner down. However, if you enable automatic state transition, DHCP failover will automatically transition to partner down state when the auto state switchover interval expires. The default value for auto state switchover interval is 60 minutes. If enabled, automatic state transition will occur from the COMMUNICATIONS INTERRUPTED state to PARTNER DOWN state when the state switchover interval expires.

Reserve Percentage: In a failover relationship configured in hot standby mode, administrators can specify a percentage of the address range of the scope as reserved for the hot standby server. A number of addresses, in proportion to the percentage value configured, are assigned to the hot standby server. The hot standby server will use these addresses to service new clients after the primary server goes down, during the time interval before the standby server assumes control over the entire IP address range of a scope. The hot standby server assumes control over the entire IP address range only after it transitions into partner down state and a certain time (defined by MCLT) has elapsed after moving into the partner down state. If an administrator sets this parameter to zero, no addresses are reserved for the hot standby server, and the failover partner server cannot grant new client leases until the time that the hot standby assumes control over the entire IP address range. The default value for reserve address percentage is 5%.

Maximum Client Lead Time (MCTL): The maximum amount of time that one server can extend a lease for a DHCP client beyond the time known by the partner server. The MCLT defines the temporary lease period given by a failover partner server, and also determines the amount of time that a server in a failover relationship will wait in partner down state before assuming control over the entire IP address range. The MCLT cannot be set to zero, and the default setting is 1 hour.