CentOS nightly auto updates using yum-cron

CentOS

It seems like new security vulnerabilities comes out at least once per month now a days. Keeping your systems up to date is the easiest way to keep these threats at bay as well as overall system stability. You can do nightly YUM updates automatically with email notifications via a package called yum-cron. This is a simple and easy solution to keeping servers up to date without using a centralized patching solution (such as Spacewalk).

Step 1 –  Install the yum-cron package and setup email notifications:

yum -y install yum-cron
chkconfig yum-cron on

Then edit /etc/sysconfig/yum-cron (CentOS 6) to set MAILTO= email address or /etc/yum/yum-cron.conf (CentOS 7) to set email_to= for email notifications. If you don’t need email notifications you can skip this part.

For CentOS 6:

[email protected]

For CentOS 7:

[email protected]

Step 2 – Start the yum-cron service…

service yum-cron start

Step 3 – Verifying yum-cron is working

Check that the service is running.

service yum-cron status

You can check your cron log at /var/log/cron to see if it ran using the following command.

cat /var/log/cron | grep yum.cron

You can also check the yum.log when it does notify of updates by email.

cat /var/log/yum.log


SubPac S1 Tactile Bass Systems Review

s_subpac_desk

As some may know I am a bit of a bass freak / audiophile. My car’s sound system is a great example of this. Music in general is a very influential and important part of my life. I listen to many different genre’s of music and my taste in music changes over time.  Anyway enough about me, this article is about my experience with the SubPac S1.

I had been watching the company called StudioFeed USA LLC for months following the teaser announcements of this product. I had been patiently waiting for the pre-orders to launch for months.  Even after my order was placed it took 2-3 months for delivery because of their initial popularity and the hand-made quality that goes into these things. I couldn’t wait for it to arrive!

The SubPac is a high-fidelity tactile bass system that quietly and directly transfers low frequencies (bass) to your body, providing the physical dimension to sound. As you lean against it (S1) or wear it (M1), you will experience a fully immersive music/sound dimension that truly is the natural, logical progression to the sound experience.  SubPac’s tactile transducers operate similarly to a speaker but vibrations are conducted through the SubPac’s vibrotactile membrane rather than through the air.  The result is an accurate, powerful and immersive experience that traditional speaker systems cannot achieve.

I can’t even begin to describe the size the smile on my face once I hooked this baby up for the first time. The ability to actually feel the music just makes it just so much better. It’s like you’ve got a 2000W sub-woofer built into your chair that only you can hear. I live in an apartment complex so I can’t exactly have my sub-woofer very high, at all. With the SubPac that doesn’t matter anymore. I have never had the intensity knob past the half-way level. It works great for music obviously, but also movies and video games.

My Setup

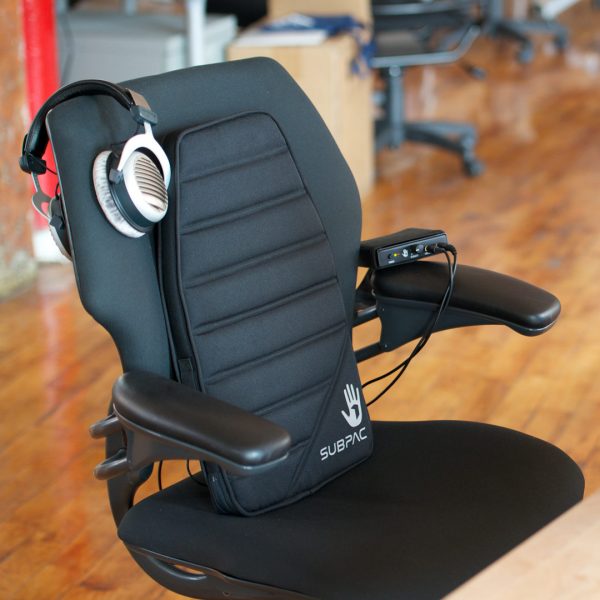
The SubPac S1 fits perfectly in between the back rest and head rest of my DXRacer computer chair. This makes it literally feel like it’s just a part of the chair. On the previous chair I had it made me sit a bit too far out on the chair and it made it too uncomfortable.

Wiring Setup

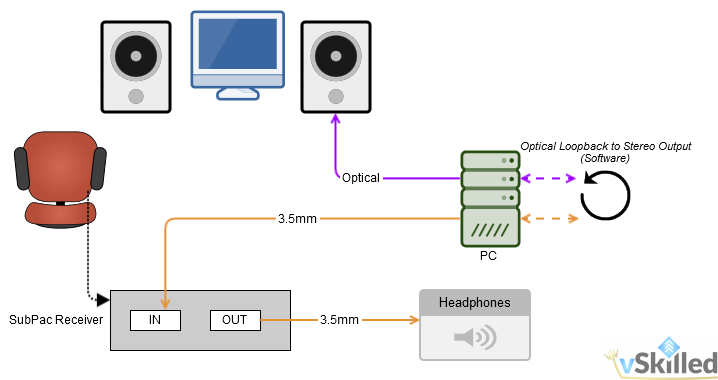
I had to do some audio card magic to make this work properly for my desired setup. I still wanted the ability to use my headphones without having to switch and play around with cables when I wanted to use my normal speakers or headphones. I also didn’t want to compromise my surround sound setup with a 3.5mm stereo cable and wanted to continue using the optical cable if possible. Normally you would just hook up the 3.5mm stereo out on your PC to the IN port on the SubPac and then the OUT port to your speakers. However I instead use my normal optical out to my surround speakers but loop-back the audio on the optical to the stereo. I then use a 3.5mm stereo out cable from the PC to the SubPac. This frees up the SubPac’s out port for my headphones permanently, no switching ever required. I drew up a quick diagram to explain this better.

subpac_wiring_diagram_v4

Conclusion

5/5. I would highly recommend the SubPac. Every piece of music you have ever owned that has a full sound will be rediscovered – any new music will be delivered the way it was intended to  – with the energy of the low frequencies physically felt in a visceral way (while not disturbing anyone around you).   The price is easily justifiable from the craftsmanship and quality that goes into building these and how much you will use it (all the time). The whole idea of the SubPac is awesome. SubPac has even helped many hearing impaired people experience music and sound. What an accomplishment!


A closer look at WHSuite (Beta 4)

000163_2015-07-16 08_11

I had an article last year about the the company (Turn 24 Ltd) looking for participants for it’s alpha/beta of WHSuite. Since then it seems development has been in full swing and now the product is in open beta – which means anyone can (and is encouraged to) beta test the software. See the WHSuite website for more details.  I have been following development ever since the alpha stage and when time permits testing their software when a new version releases.

In this post I wanted to take a deeper look at what makes WHSuite. I will be doing a basic install on the vSkilled development server and playing around inside WHSuite. I’ll be adding some dummy customers, packages, domains, etc and see how things function at a core level. As the software is still in beta status we have to take into account that things can and will change – however with the launch of this version a developer has stated “Beta 4 concludes all changes to WHSuites core. At this point we’re only focusing on code-breaking bug fixes.” says Rick from WHSuite. This means this is basically what we can expect to see in the general availability release of the software at launch; of course following minor changes, bug fixes and probably some cosmetic changes.

Actually during the writing of this blog post I uncovered a number of bugs with the software and reported all that I could find to the developers.

The purpose of this post is to take a look at WHSuite in it’s current state for those who haven’t had a chance to see it in action, as well as provide my opinion on it for feedback to the community and developers for making potential improvements. This is not a sponsored/paid post.

vSkilled WHSuite Test Environment: (2015-07-15)

  • 2 CPU / 4GB RAM CentOS 6 VPS Server with cPanel/WHM 11.50.0 (Build 23)
  • Apache Version 2.2.29 w/ Varnish Cache
  • PHP Version 5.5.26
    • Ioncube Loader, MCrypt, PDO, PHP JSON, and Fileinfo Extensions
  • MySQL Version 5.5.42-cll
  • ModSecurity disabled
  • WHSuite Version 1.0.0-beta.4

WHSuite Installation Process

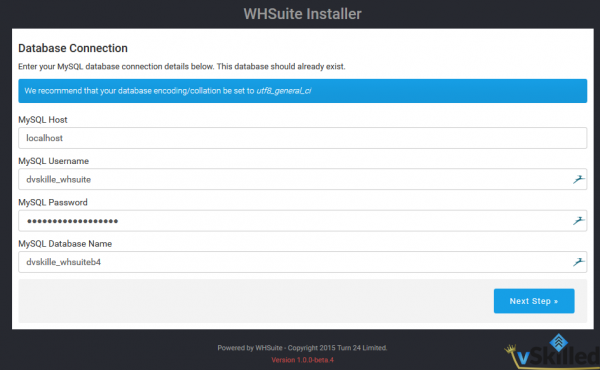
At the time of this writing there is only a scarce amount of documentation for WHSuite, that is something they are actively working on. That’s fine anyway because I probably wouldn’t read it unless I encountered an issue. Prior to this setup I created a MySQL Database and User with appropriate permissions and uploaded the WHSuite files to the web server.

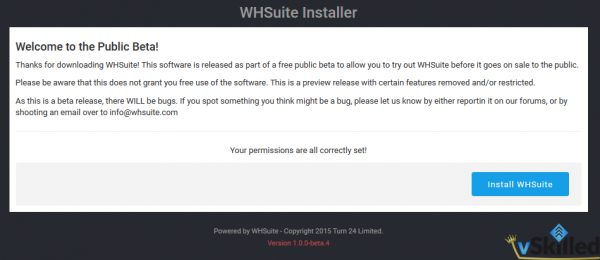
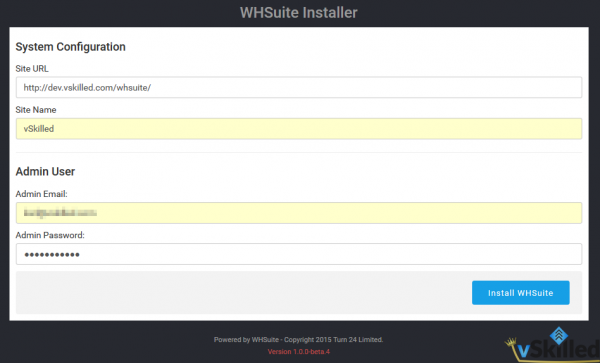
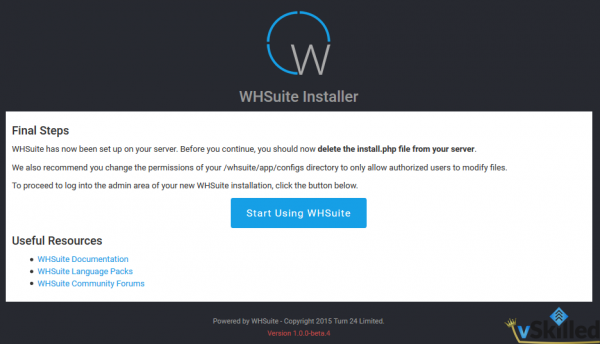
After filling in a few setup forms our WHSuite install was finished. A quick removal of install.php and a tweak of .htaccess since I had installed it into a sub folder and I was up and running in about 5 minuets. Out of the box it gives you a clean/bare installation that you can then fully customize. Props for a very easy install process.

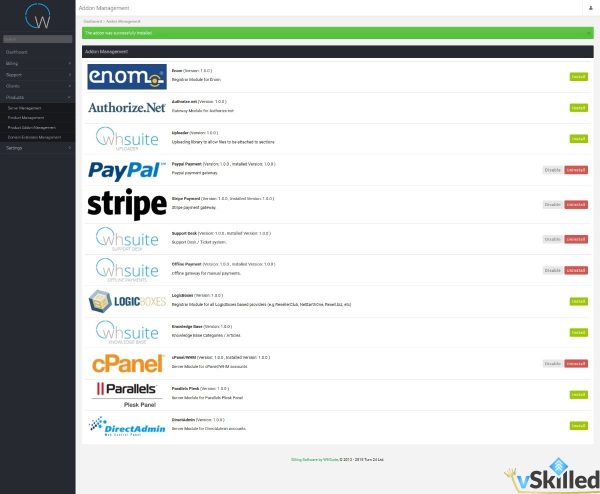
By default all of the “Addons” are disabled, so first you will want to check out the Addon Management page and enable everything that you would want be using in your environment. It has the basics that you would expect from a web host billing platform; domain registrar modules, payment modules, ticket system, knowledge base system, and support for cPanel, Parallels, and DirectAdmin.

For the purposes of this demonstration I took some time to setup some dummy information (clients, packages, etc) to replicate what this might actually look like in a production environment. To properly set everything up to point of accepting a customer for example would take at least an hour if you have everything required (cPanel server info, email’s setup for support system, etc).

Administration Interface

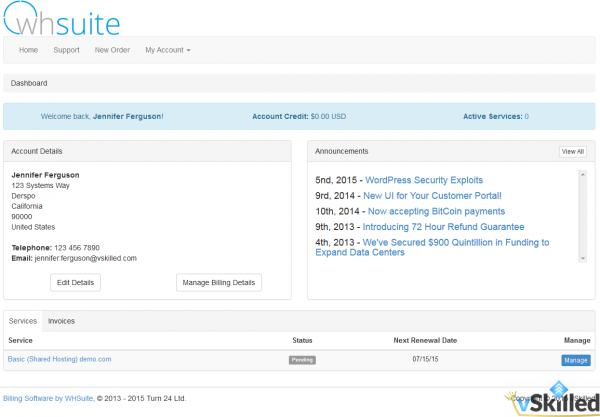
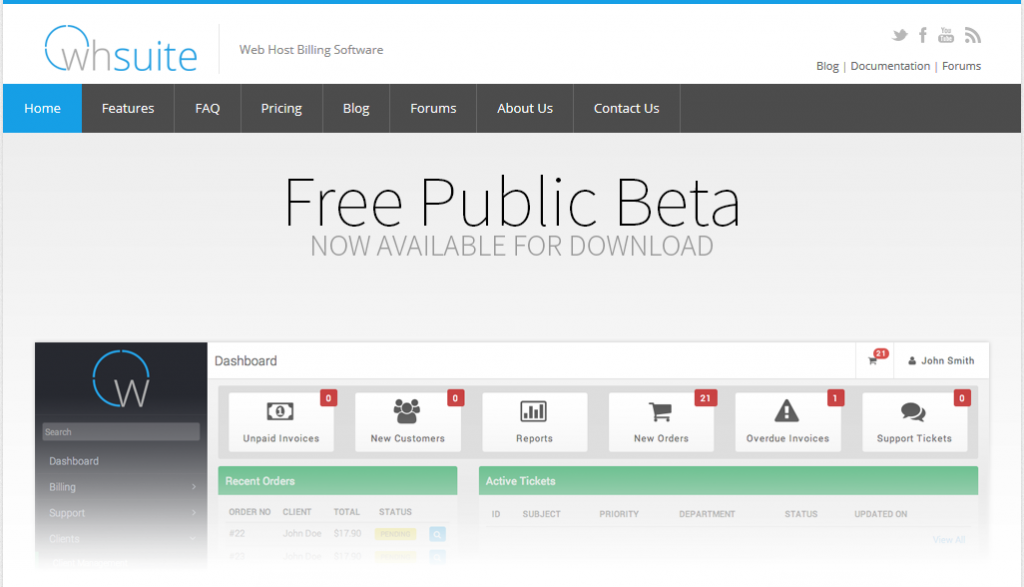
WHSuite uses a modern looking administration dashboard. The dashboard is where you can get a quick glace of the current state of your business. This is the area where as the business owner, support or sales agent will spend most of their time so it has to be functional and clean which I believe WHSuite does quite well.

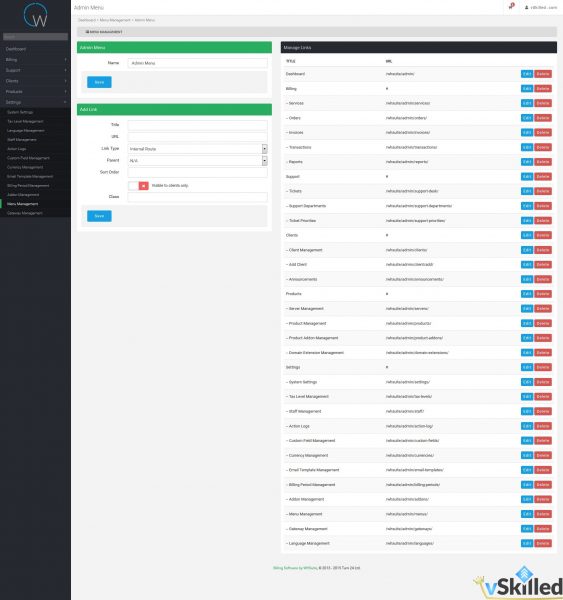
It is a tree-menu driven system to navigate around in the backend. I found it nice to have full control over the menu system (from Menu Management) of both the client and admin interface. If you wanted you could completely re-arrange all of the links of the menu’s as well as add, change, or remove the existing links.

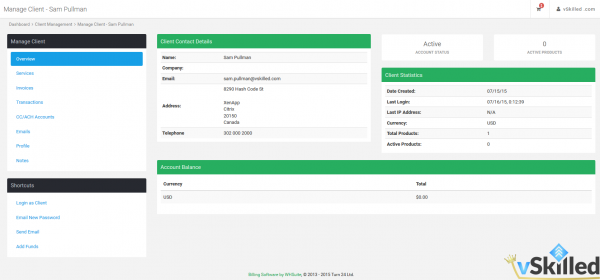
Customer management I found to be slightly lacking in terms of functionality. For example if I wanted to manually add a service/package to a customer’s account from the admin back-end there is no way to do so without using the login-as-client feature and placing an order on their behalf. In the couple of hours I spent playing around I found it had a bit of a learning curve to find where things were, but once that was sorted out it wasn’t too bad.

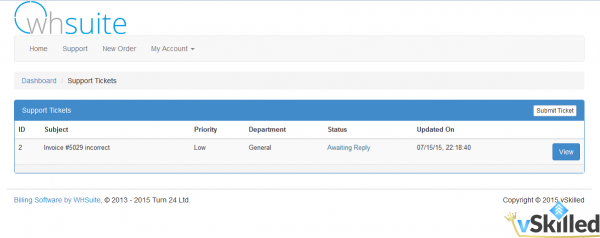
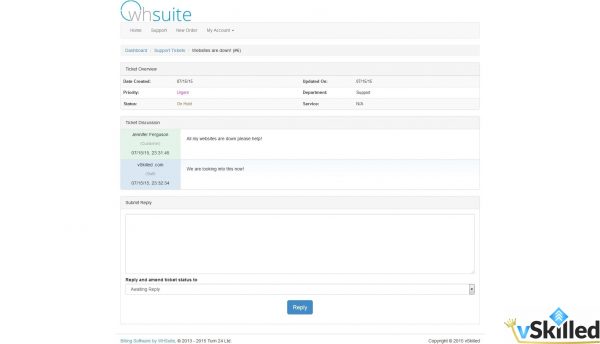
The support system was pretty basic as well but would be fine for a small hosting business. You can customize the support ticket statuses, colors, and it has an auto close functionality. It also supports having multiple departments and email piping. I didn’t like that clients have the ability to change the status of tickets with their reply and would hope for more granular permission control over something like that in a future release. For example a client can change the ticket status when they submit a reply. In the situation of an abuse complaint support ticket for example I wouldn’t want the client being able to change the ticket status from their end.

I really liked how Stripe was included as a payment gateway out of the box as this is still something that most other billing solutions don’t have without the use of a third-party plugin.

Client Interface

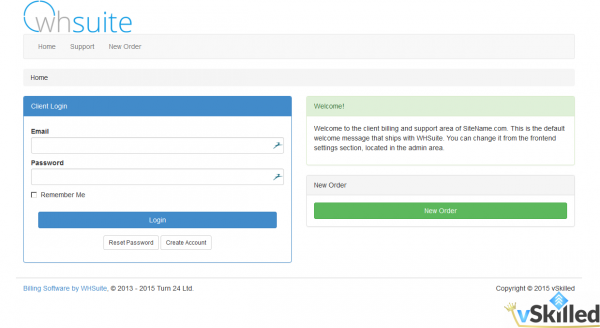
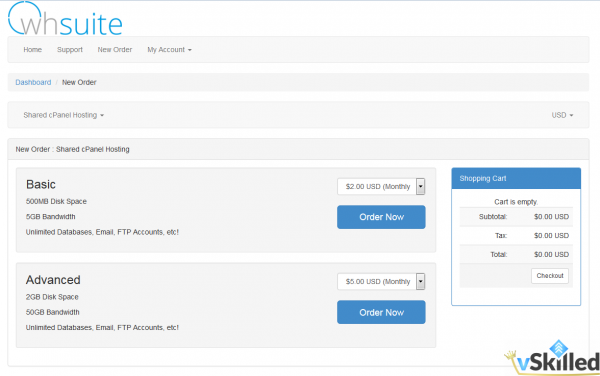
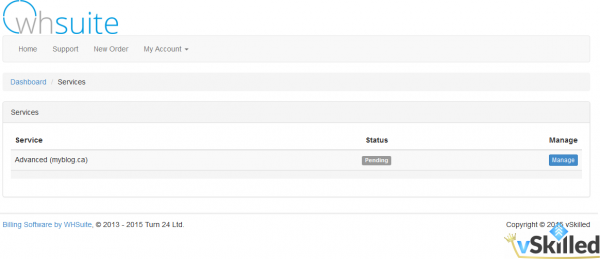
The client interface is the “business end” of any billing suite. With WHSuite you get a pretty simple and clean looking client area. It’s almost too clean though because it has a very “stock” feel to it. In time I can imagine this will improve and I’m sure it wouldn’t be too difficult to re-brand it.

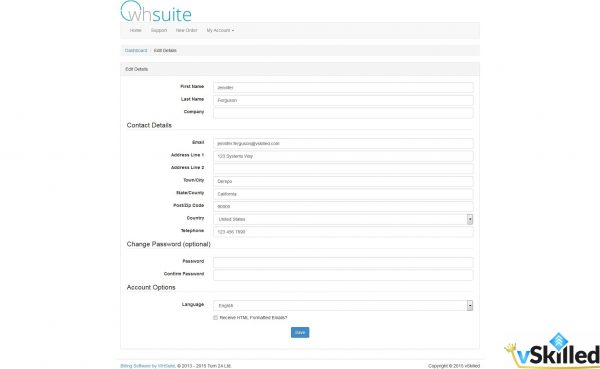
There is everything you would expect that a client would need to manage their account, pay their invoices, and manage their services. Clients have the ability to submit tickets if the support system module is enabled. There is also a knowledge-base addon that I didn’t get into testing but is freely available for use.

Keep in mind all client information shown in the images (and otherwise) is completely fictional.

Conclusion

Overall I think WHSuite has potential. You have to keep in mind that they are trying to compete with many other types of billing platforms for web hosting companies. In it’s current state I think WHSuite will have some work to do to get up to par with some of those other billing systems, but considering the software is still in it’s infancy they are off to a great start. Over time as WHSuite matures as both the software and their company I think that they could definitely compete in the market. I think WHSuite would be best offered at a lower competitive price point and targeted towards startup and smaller web hosting operations.


What are your thoughts on WHSuite? What billing platform do you use and why? Leave a comment below!


Windows Server 2012 R2 – DHCP High Availability / Fail-over Setup Guide (Part 2)

windows_server_2012

Part 2 – Setup of Windows 2012 R2 DHCP Failover

Click here to go to Part 1

This build will required 2 x Windows 2012 R2 servers. They both must have the DHCP role installed in preparation for the DHCP fail over configuration. I will not cover the installation of the the OS in this guide.

In this guide I simply used two VMware virtual machines in my home lab to accomplish this. The two servers I used are actually my domain controllers as well. In a production environment it would be best to have this as a dedicated role on the servers, depending on the size & requirements of the environment. We will be building a DHCP Hot-Standby cluster.

1 – Server Preparation

  1. Build your two required Win. 2012 R2 servers.  Your servers should configured with an IP address, DNS, domain, etc and should be fully functioning on your network.
  2. Ensure that the DHCP role is installed on both servers. From the Server Manager select the Manage button, and click Add Roles and Features.
    000145_2015-07-06 13_40
  3. Select “Role-based or feature-based installation“. Click Next.
  4. Select your server from the list in the pool. It should reflect your FQDN and IP appropriately, ensure this is correct. Click Next.
  5. From the Roles list, select “DHCP Server“. Another prompt will appear to install the management tools. Click Add Features, then click Next.
  6. Skip to the end of the installer and click Install. The DHCP role will be installed. Repeat this process on the 2nd server.
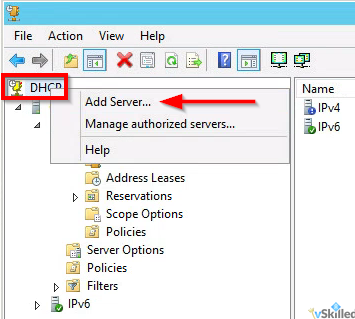
  7. Open the DHCP management utility from the Administrative Tools folder on your primary server. This gives us a view of the DHCP installation on the local server. From the DHCP root menu, right click and select “Add Server” as shown.
    000146_2015-07-06 13_54
  8. Enter the FQDN or IP of your 2nd Win. 2012R2 server and click OK. This will add the second server into the view so that we can manage both servers from here.

2 – Scope Setup

Before we can setup DHCP failover we need at least one DHCP scope configured. This scope should ONLY be configured on the primary DHCP server and MUST NOT be added to the secondary DHCP server.

  1. On your primary server only – Right click on the IPv4 object. Click “New Scope…”. This will add a new IPv4 scope.
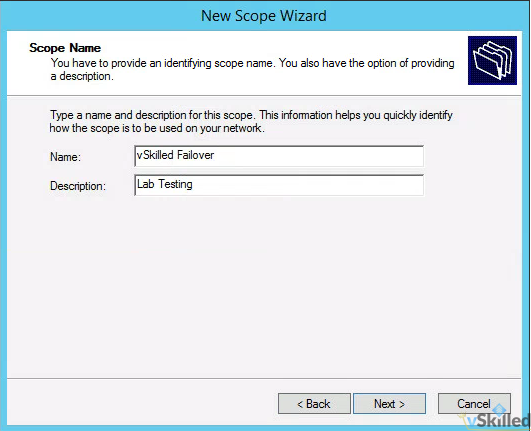
  2. Enter the Name and Description of your DHCP scope. Click Next.
    000147_2015-07-06 14_01
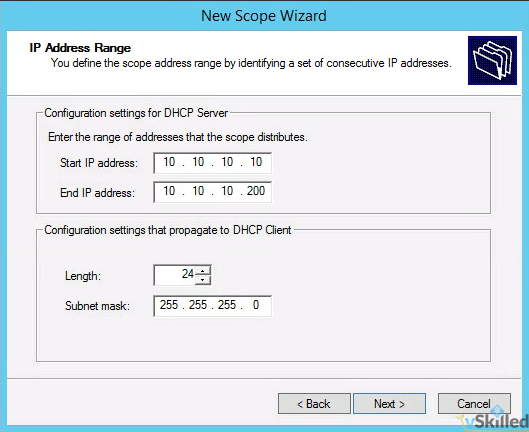
  3. Enter the IP range of the scope as well as the subnet length and mask. The mask should be generated for you based on the length you enter. A /24 would include 254 usable IP’s which is more than sufficient for this test.
    000148_2015-07-06 14_08
  4. You will be promoted for any exclusions or delays. Add if required. Otherwise click next.
  5. Enter the lease duration for the scope. I will leave this at the default of 8 days. Click Next.
  6. Select “Yes, I want to configure these options now“. This will allow us to configure the gateway, DNS servers appropriately so that clients who get an IP address can communicate properly on our network.
  7. On the Router / default gateway page enter the IP address of your router or aggregate switch here. Click Add, then Next.
  8. On the DNS Name and DNS servers page enter the domain of your environment and the DNS servers that you want clients to use. Click Next.
  9. Add a WINS server if you have or need one. (Probably not.) Click Next.
  10. Finally you will be asked to activate the scope now. Select “No, I will activate the scope later“, or you can enable it if you wish. Click Next, then click Finish.

3 – Failover Cluster Configuration / Setup

Now we will configure the DHCP failover cluster on the DHCP scope(s).

  1. Right click on the root IPv4 menu and click “Configure Failover…”.
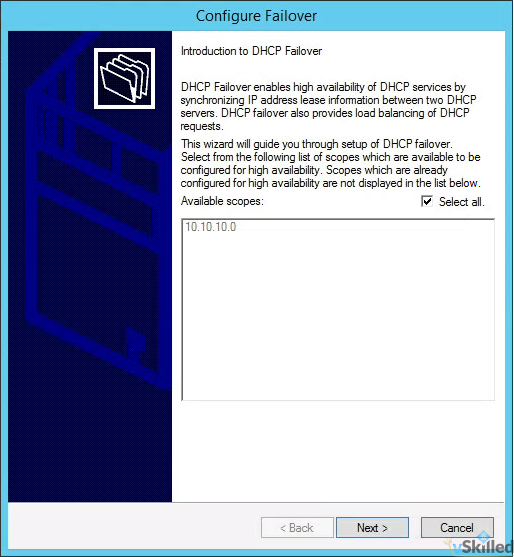
  2. By default “Select all” is selected. If that is okay, you can leave that selected. Otherwise you can manually select the IPv4 scope(s) that you want to have failover enabled on. Click Next.
    000149_2015-07-06 14_22
  3. Enter the FQDN or IP of the secondary DHCP server and click Add Server. Click Next.
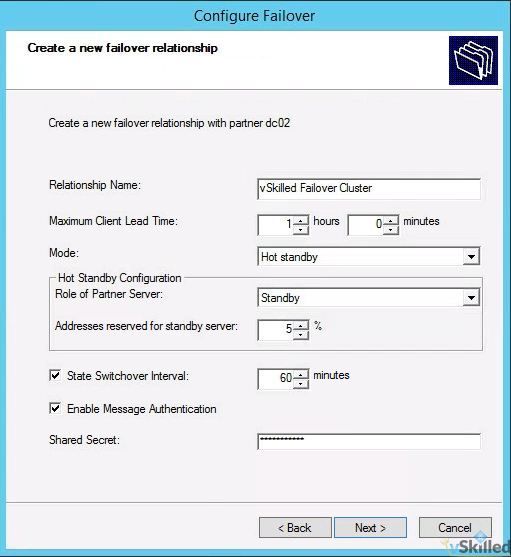
  4.  Configure the Failover Relationship options. (Please see below for an explanation of these options!)
    • Relationship Name: <enter a name for your DHCP failover relationship>
    • Max Client Lead Time: 1 hour (default)
    • Mode: Hot-Standby
    • Reserve Addresses %: 5% (default)
    • State Switchover Interval: Checked, 1 hour
    • Enable Message Authentication: Yes
    • Shared Secret: <configure a secure password>
      000150_2015-07-06 14_43
  5. Once you have configured the options to your liking, click Next. A summary screen will appear. Click Finish to create the failover relationship.
    000151_2015-07-06 14_48
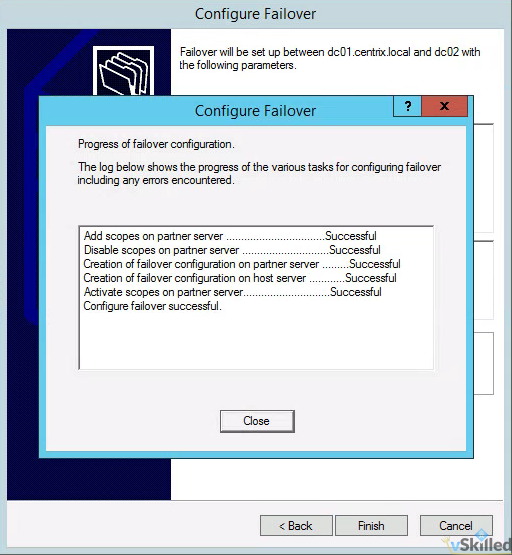
  6. You will get a screen that shows the status of the replication of your scope to the partner/secondary server. Ensure everything shows as “successful” and close the window.
  7. We have now successfully setup a Windows 2012 R2 DHCP  hot-standby fail-over cluster!

Going Deep – Explanation of Windows 2012 DHCP fail-over configuration options

In summary, the State Switchover Interval needs to be configured so that the servers will automatically failover to the standby server without manual administrator intervention. We must also configure the MCTL value so that the partner server can issue temporary leases addresses until the standby server takes full control of the scopes which happens after the State Switchover Time expires and the partner transitions to Partner Down state.

Both DHCP servers in a failover relationship must maintain a persistent TCP connection with each other. DHCP failover partners establish and maintain this connection on port 647, and use it to exchange operational state information and lease information.

State Switchover Interval: If automatic state transition is enabled, a DHCP server in communication interrupted state will automatically transition to partner down state after a defined period of time. This period of time is defined by the state switchover interval. A server that loses communication with a partner server transitions into a communication interrupted state. The loss of communication may be due to a network outage or the partner server may have gone offline. By default, since there is no way for the server to detect the reason for loss of communication with its partner, the server will continue to remain in communication interrupted state until the administrator manually changes the state to partner down. However, if you enable automatic state transition, DHCP failover will automatically transition to partner down state when the auto state switchover interval expires. The default value for auto state switchover interval is 60 minutes. If enabled, automatic state transition will occur from the COMMUNICATIONS INTERRUPTED state to PARTNER DOWN state when the state switchover interval expires.

Reserve Percentage: In a failover relationship configured in hot standby mode, administrators can specify a percentage of the address range of the scope as reserved for the hot standby server. A number of addresses, in proportion to the percentage value configured, are assigned to the hot standby server. The hot standby server will use these addresses to service new clients after the primary server goes down, during the time interval before the standby server assumes control over the entire IP address range of a scope. The hot standby server assumes control over the entire IP address range only after it transitions into partner down state and a certain time (defined by MCLT) has elapsed after moving into the partner down state. If an administrator sets this parameter to zero, no addresses are reserved for the hot standby server, and the failover partner server cannot grant new client leases until the time that the hot standby assumes control over the entire IP address range. The default value for reserve address percentage is 5%.

Maximum Client Lead Time (MCTL): The maximum amount of time that one server can extend a lease for a DHCP client beyond the time known by the partner server. The MCLT defines the temporary lease period given by a failover partner server, and also determines the amount of time that a server in a failover relationship will wait in partner down state before assuming control over the entire IP address range. The MCLT cannot be set to zero, and the default setting is 1 hour.


Windows Server 2012 R2 – DHCP High Availability / Fail-over Setup Guide (Part 1)

windows_server_2012

Part 1 – Background on Windows DHCP

Click here to go to Part 2

Why move to Windows 2012 R2 for DHCP? (from 2008 R2)

First we must understand how DHCP works in Windows Server 2008 R2. DHCP met high availability requirements by hosting the DHCP service on a Windows Failover Cluster or using split scope deployments. These mechanisms both have their disadvantages.

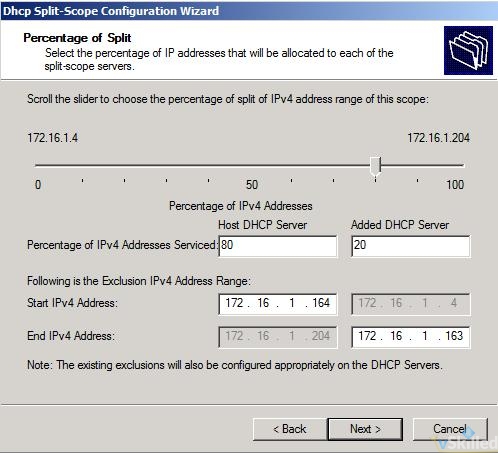
The split scope mechanism relies on configuring identical scopes on two DHCP servers and setting up the exclusion ranges in such a fashion that 80% of a subnet’s IP range is used for leasing out IP addresses by one of the servers (primary) and remaining 20% by the other server (secondary). The secondary server is often configured to respond to clients with a slightly delayed response so that clients use IP addresses from the primary server whenever it is available. Split scope deployments suffer from two problems. IPv4 subnets often run at utilization rates above 80%. In such subnets, split scope deployment is not effective given the low free pool of IP addresses available. The other issue with split scope is the lack of IP address continuity for clients in case of an outage of the primary server. Since the IP address given out by the primary DHCP server would be in the exclusion range of the secondary server, the client will not be able to renew the lease on the current IP address and will need to obtain a new IP address lease from the secondary server. In the case of split scope, the two DHCP servers are oblivious to each others presence and do not synchronize the IP address lease information.

dhcpsplitscope

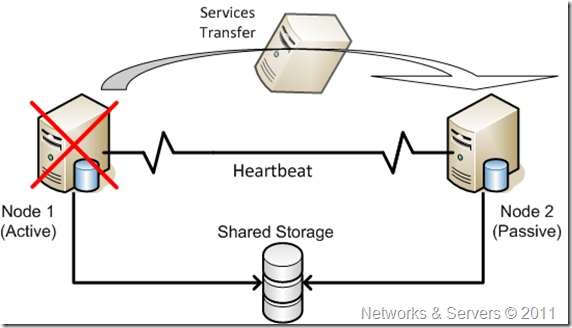
When using Windows Failover Cluster, the DHCP database needs to be hosted on a shared storage accessible to both nodes of a cluster in addition to the deployment of the cluster itself. DHCP servers running on each node of the cluster operate on the same DHCP database hosted on the shared storage. In order to avoid the shared storage being the single point of failure, a storage redundancy solution needs to be deployed. In a virtual environment this is even more complicated. This increases the complexity as well as the TCO of the DHCP high availability deployment. Yuck..

windowsfailoverclustering


Windows Server 2012 R2 brings real fail over to the table!

The Windows Server 2012 DHCP fail over mechanism eliminates these shortcomings and provides a vastly simplified deployment experience. Moreover, DHCP fail-over is supported in all editions (Foundation, Standard, Data Center) of Windows Server 2012.

  • DHCP failover can be configured, and settings can be modified without the need to pause, stop, or restart the DHCP Server service.
  • Replication of scope settings can be initiated from either DHCP server to its failover partner server.
  • DHCP servers configured as failover partners can be located on different subnets, but this is not required.
  • When DHCP failover is enabled on a DHCP scope, the DHCP server that renews a DHCP client lease can be different from the DHCP server that initially granted the lease.
  • Two DHCP servers configured as failover partners will attempt to maintain a persistent TCP/IP connection.
  • Two separate, synchronized client lease databases are maintained independently by each DHCP failover partner server.
  • DHCP servers configured as failover partners are both aware of the status of the DHCP service on the other server, and are informed of any change in that status with minimal delay.
  • If two DHCP servers configured as failover partners are unable to communicate, precautions are taken to avoid the same IP address lease being issued to two different DHCP clients.
  • If a DHCP server becomes unavailable before it is able to successfully synchronize all DHCP client information with its failover partner, precautions are taken to ensure DHCP lease continuity for DHCP clients.

imarealboy

Windows Server 2012 DHCP provides a new high availability mechanism addressing these critical aspects. Two DHCP servers can be set up to provide a highly available DHCP service by entering into a fail-over relationship. A fail-over relationship has a couple of parameters which govern the behavior of the DHCP servers as they orchestrate the fail-over. One of them is the mode of the fail-over operation – I will describe this shortly. The other is the set of scopes that are part of the fail-over relation. These scopes are set up identically between the two servers when fail-over is configured. Once set up in this fashion, the DHCP servers replicate the IP address leases and associated client information between them and thereby have up-to-date information of all the clients on the network. So even when one of the servers goes down – either in a planned or in an unplanned manner – the other DHCP server has the required IP address lease data to continue serving the clients.

Gotcha’s

  • You cannot configure DHCP failover on a DHCP scope to include more than two DHCP servers.
  • DHCP failover supports DHCPv4 scopes only. DHCPv6 scopes cannot be failover-enabled.
  • If parameters of a failover-enabled scope are modified, these settings must be manually replicated to the partner DHCP server. Note: Automatic replication of scope settings is available if you use IP address management (IPAM) in Windows Server 2012 R2 to modify failover-enabled scope settings.
  • DHCP clients must be able to communicate with both DHCP failover partner servers, either directly or using a DHCP relay.


Click here to go to Part 2