ARIN Region IPv4 Free Pool Reaches Zero

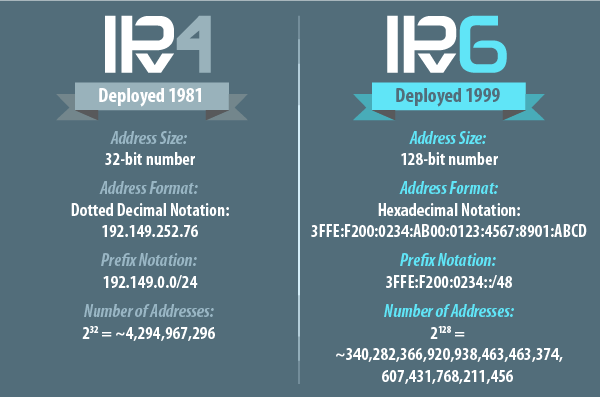
v4_v6_table

Well it has finally happened. The IPv4 free pool for the ARIN region is now fully depleted. ISPs are encouraged to utilize IPv6 for additional customer growth and the IPv4 transfer market for their IPv4 interim needs.

A copy of the announcement:

From: ARIN <[email protected]<mailto:[email protected]>>
Subject: [arin-announce] ARIN IPv4 Free Pool Reaches Zero
Date: September 24, 2015 at 12:04:22 PM EDT
To: <[email protected]<mailto:[email protected]>>

On 24 September 2015, ARIN issued the final IPv4 addresses in its free
pool. ARIN will continue to process and approve requests for IPv4
address blocks.  Those approved requests may be fulfilled via the Wait
List for Unmet IPv4 Requests, or through the IPv4 Transfer Market.

For information on the Waiting List, visit:
https://www.arin.net/resources/request/waiting_list.html

For information on IPv4 Transfers, visit:
https://www.arin.net/resources/transfers/index.html

Exhaustion of the ARIN Free Pool does trigger changes in ARIN’s
Specified Transfer policy (NRPM 8.3) and Inter-RIR Transfer policy (NRPM
8.4). In both cases, these changes impact organizations that have been
the source entity in a specified transfer within the last twelve months:

“The source entity (-ies within the ARIN Region (8.4)) will be
ineligible to receive any further IPv4 address allocations or
assignments from ARIN for a period of 12 months after a transfer
approval, or until the exhaustion of ARIN’s IPv4 space, whichever occurs
first.”

Effective today, because exhaustion of the ARIN IPv4 free pool has
occurred for the first time, there is no longer a restriction on how
often organizations may request transfers to specified recipients.

In the future, any IPv4 address space that ARIN receives from IANA, or
recovers from revocations or returns from organizations, will be used to
satisfy approved requests on the Waiting List for Unmet Requests. If we
are able to fully satisfy all of the requests on the waiting list, any
remaining IPv4 addresses would be placed into the ARIN free pool of IPv4
addresses to satisfy future requests.

ARIN encourages customers with questions about IPv4 availability to
contact [email protected] or the Registration Services Help Desk at
+1.703.227.0660.

Regards,

John Curran
President and CEO
American Registry for Internet Numbers (ARIN)


This means a number of things for the Internet as we know it. The costs of IPv4 IP addresses will increase significantly. This will hopefully help force the push to to IPv6 in the future since it would be more cost effective and generally the ‘right’ thing to do.

Some major providers on the other hand are alarmingly still very far behind in their IPv6 adoption than they probably should be considering this important announcement. Many parts of the internet are IPv6 enabled and ready to be used. The whole reason for the inertia against going to IPv6 is “if it ain’t broke, don’t fix it”. Well now it is broken.

 

New ESXi Server Build – VMH02 Replacement

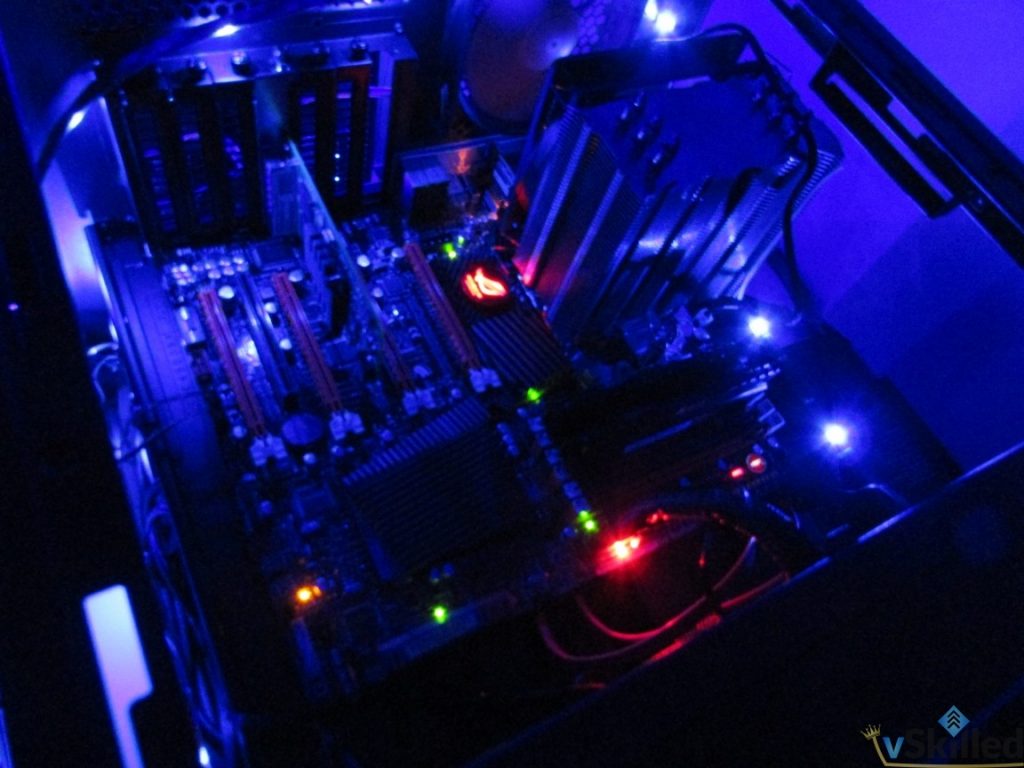
IMG_0184

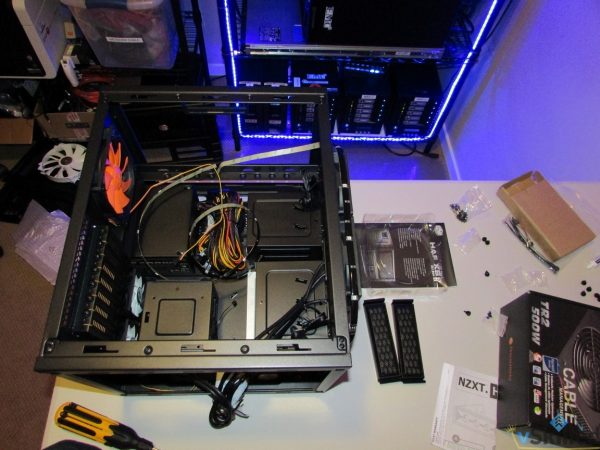
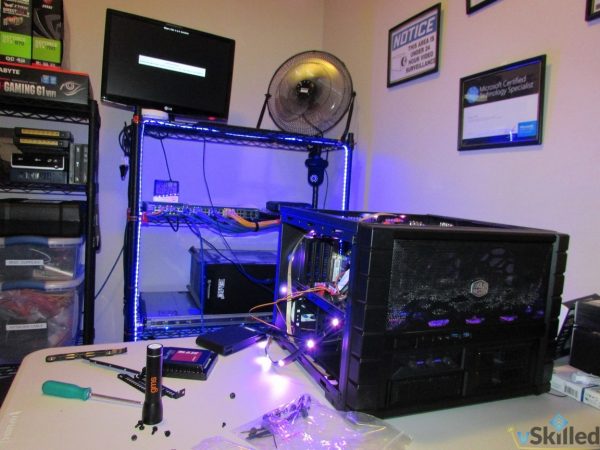
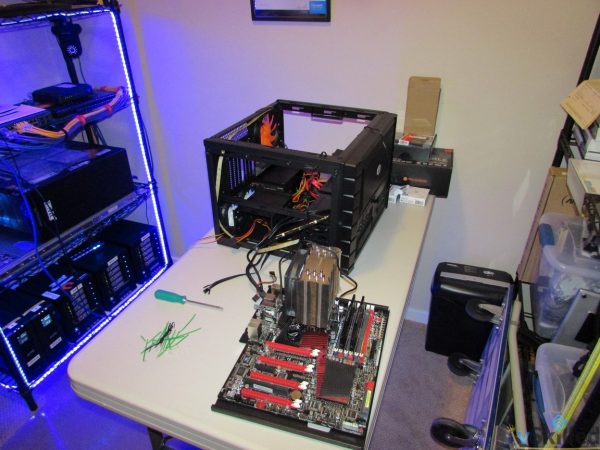
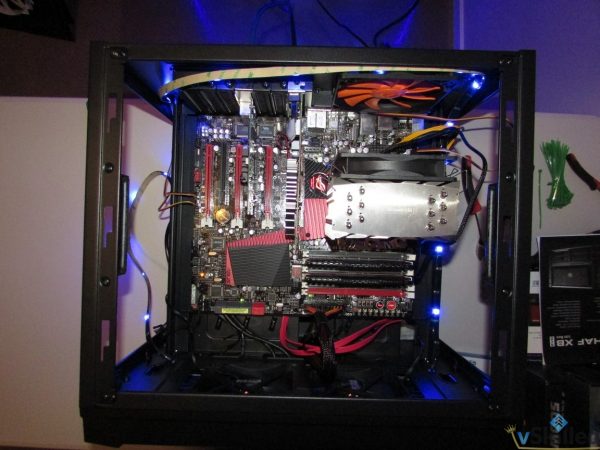
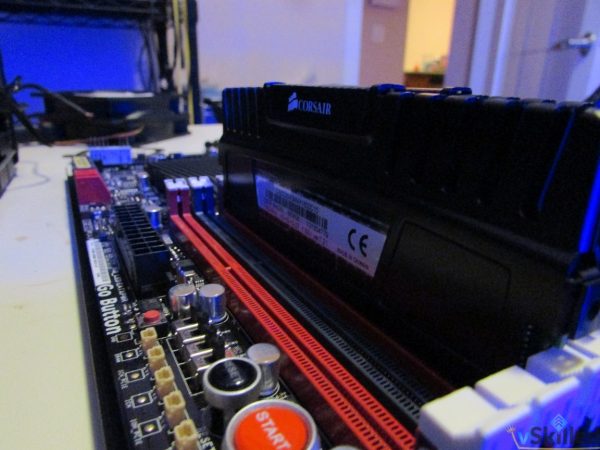
This build was originally meant to be a remote ESXi server for my parents place, but I’ve ended up liking this new build so much I’m going to have to keep it for myself. So what I’ll be doing is finishing up this build for my lab and swapping my current 2nd ESXi host (VMH02) to be my MediaPC, and finally re-purposing the MediaPC hardware as an ESXi host for the original plan of the remote lab.

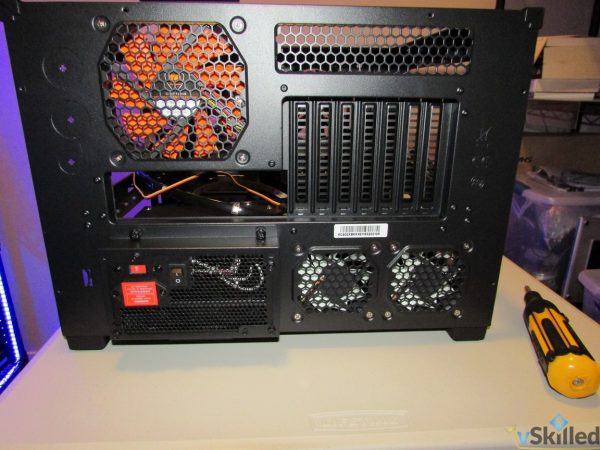
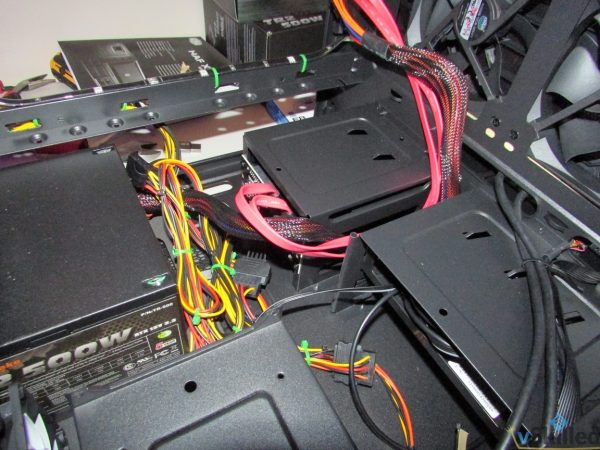
I sort-of figured in the beginning of this remote lab project that I could end up falling in love with the build and deciding to keep it, and well… here we are. I really like the new case (Cooler Master HAF XB EVO ATX) and I’ll be buying another of them for the remote ESXi lab. It’s big/open, lots of fan slots, easy to use and cable manage. That and now that I know how to work with the case properly on the next build it will be super easy to plan out and execute.

ComponentPart NameCost (CAD)
CPUIntel® Core™ i7-950 Processor$50 (used)
MotherboardASUS Rampage III Extreme LGA 1366 Intel X58 SATA 6Gb/s USB 3.0 ATX Intel Motherboard $50 (used)
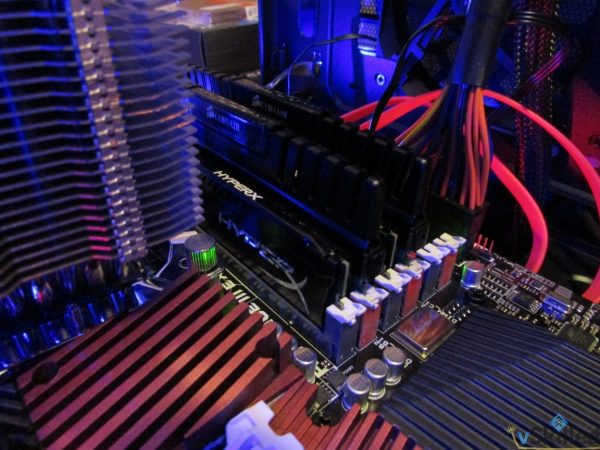
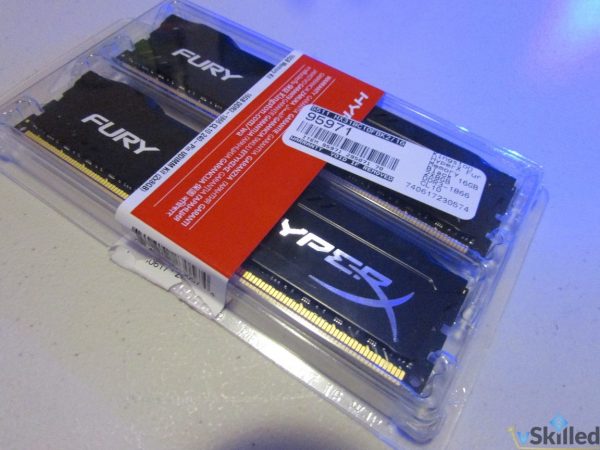
RAMKingston HyperX Fury Memory Black 16GB 2X8GB DDR3-1866 CL10 - and -
Corsair Vengeance 16GB 2X8GB DDR3-1866
$120
Power SupplyThermaltake TR2 500W Power Supply Cable Management ATX12V V2.3 24PIN With 120mm Fan$50 (have)
CaseCooler Master HAF XB EVO ATX$110
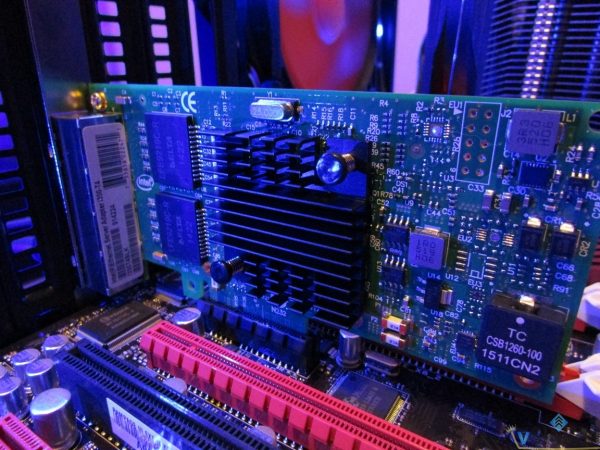
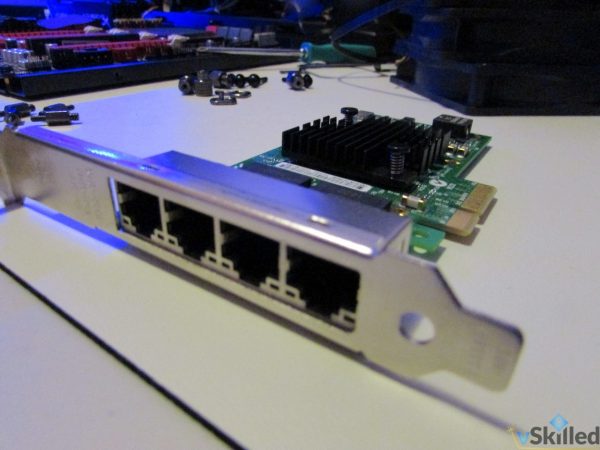
NetworkIntel I350-T4 PCI-Express PCI-E Four RJ45 Gigabit Ports Server Adapter NIC$60
Fans / MiscNZXT Hue 3 RGB Color Changing LED Controller, 2 x 80mm (buy), 1 x 200mm (have), Thermal Compound$50
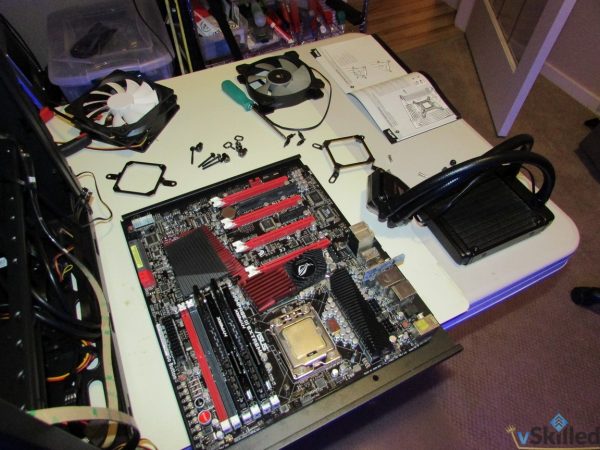
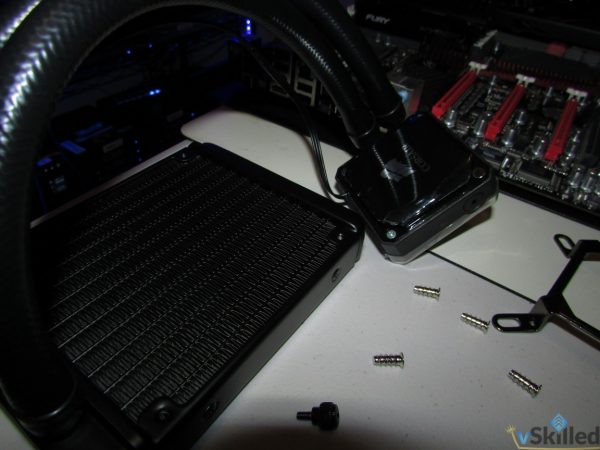
CPU CoolerCorsair Cooling Hydro Series H60$70
~$560

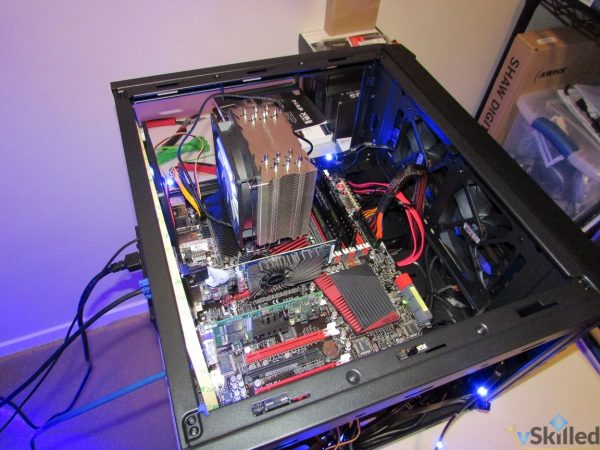
Once replaced the new VMH02 will be an Intel i7-950 with 32GB of RAM. A small upgrade from the previous i7-920 with 20GB of RAM. I was able to get the used Motherboard, CPU, and 16GB Corsair RAM of RAM (see table above) from a buddy for $120 total.  That alone saved me easily about $600, compared to buying new.

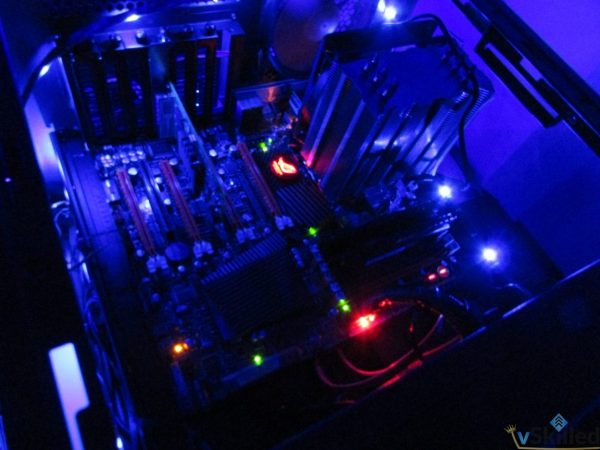
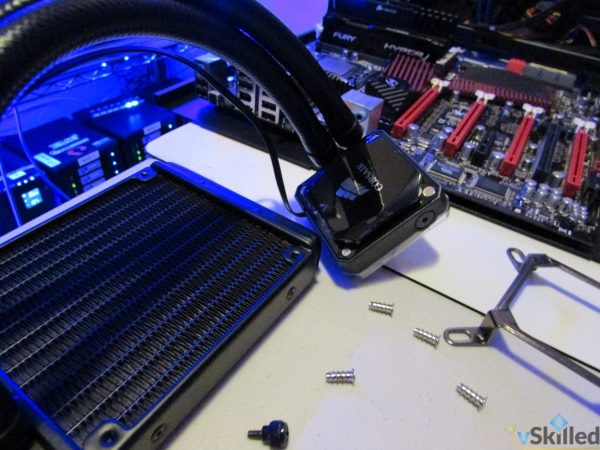
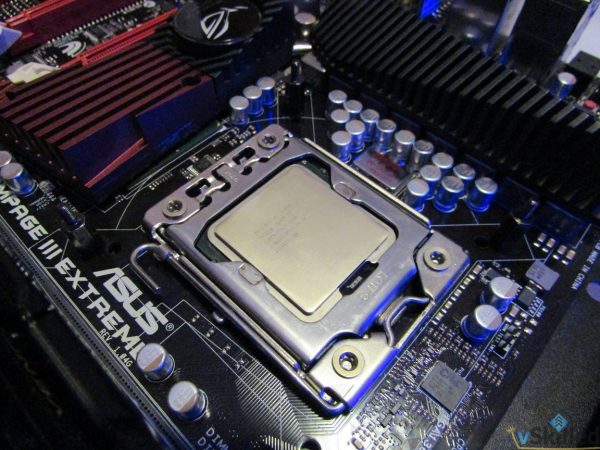
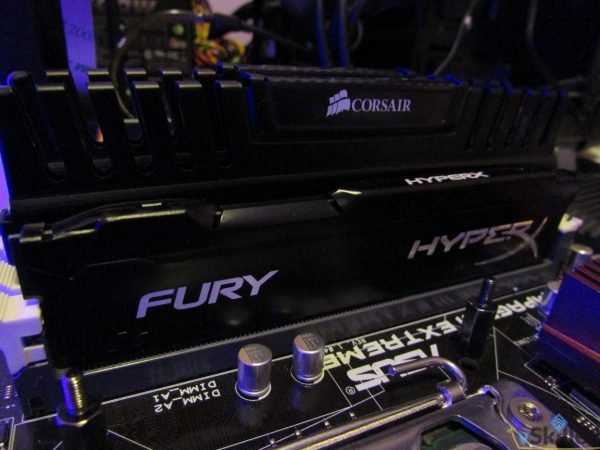
Build Progress:

I’ll another update in the coming days on build progress. 🙂

VMware HTML5 Client?

ESXiHostClientFlingScreenShotNew-1024x570

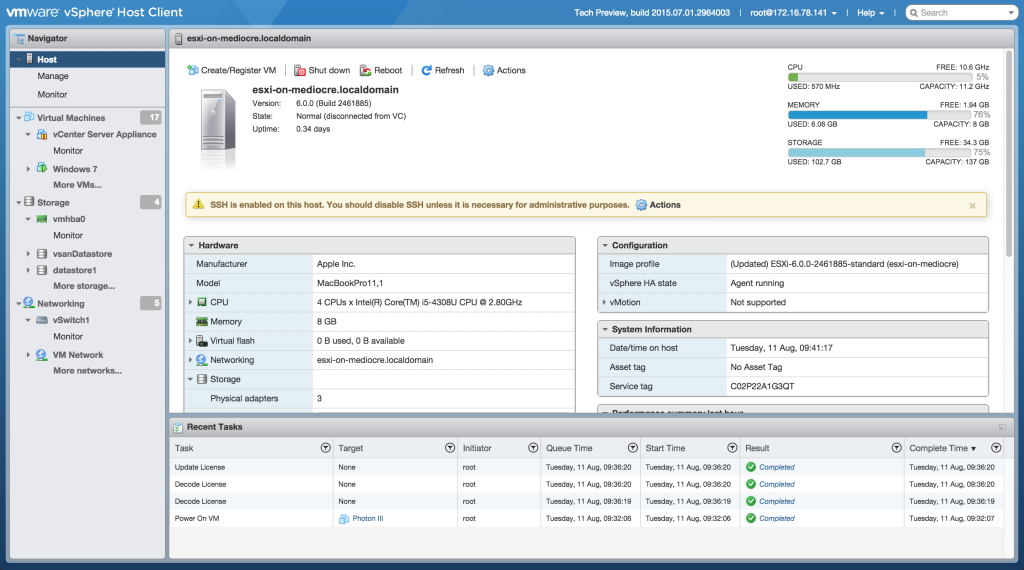
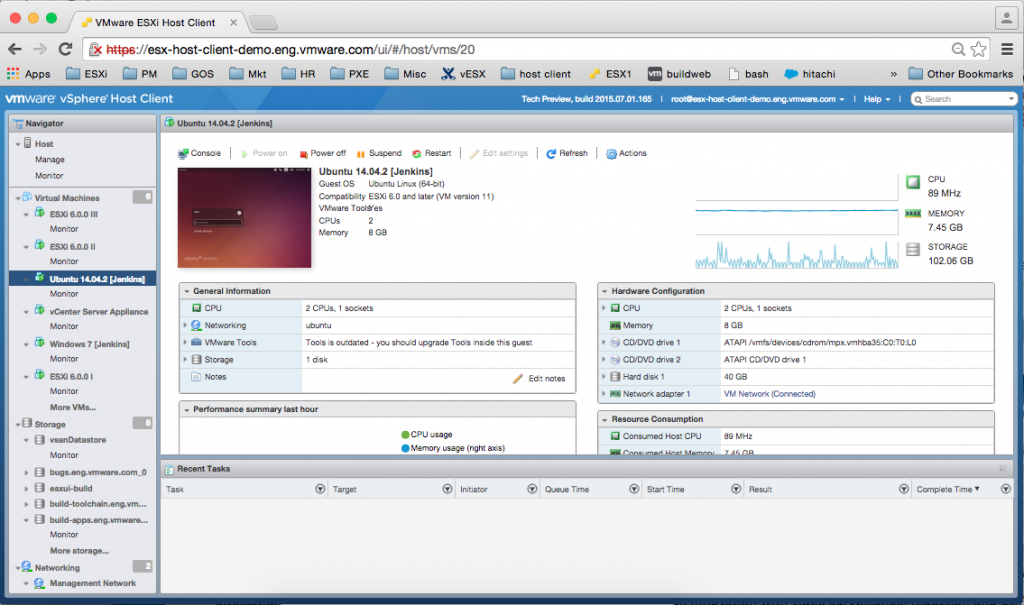
I’ve caught wind of a real HTML5 web client being developed. Its currently very early into development and is released as technical preview fling. To be clear it’s not for vCenter, but we can only imagine the direction this would eventually go. This version of the ESXi Embedded Host Client is written purely in HTML and JavaScript, and is served directly from your ESXi host. So that means it’s specifically meant to run on the host, and controls only the host but it claims to “perform much better than any of the existing solutions”.

Mainly I am happy to hear that there is no Flash dependency in this version of the web client. Maybe the feedback from customer’s is actually being heard by VMware. Maybe we could see this continue to develop into replacing the vCenter version of the flash web client. We’ll have to wait and see, but for now we know that at least something is being worked on and that is better than nothing.

ESXiHostClientFlingScreenShotNew_2

See full details on the ESXi Embedded Host Client on the VMware Labs website here:

NoFlashLogo

Steam – “Pressure” Skin

steam_pressure_eased

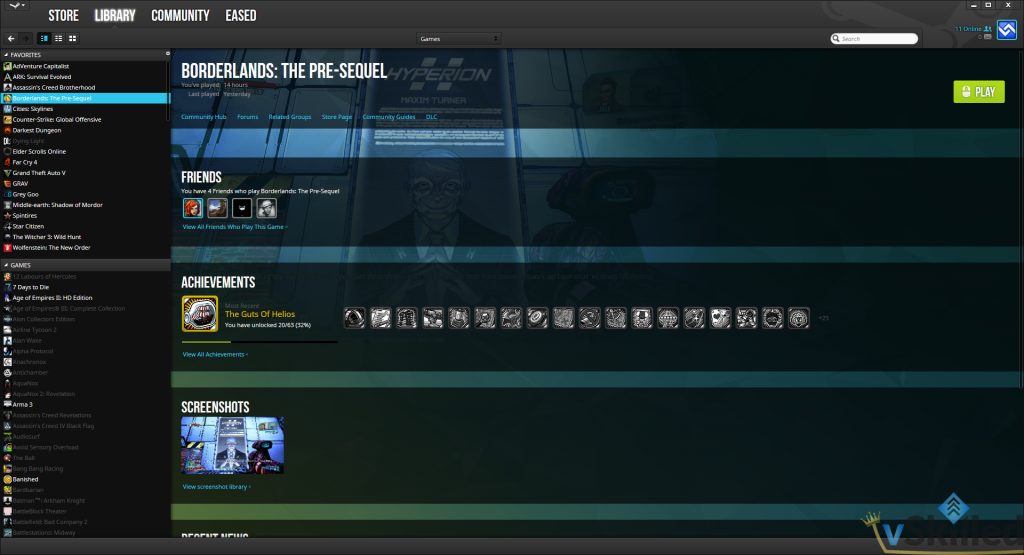
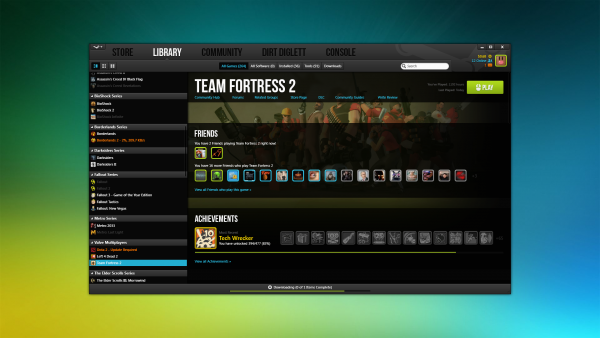
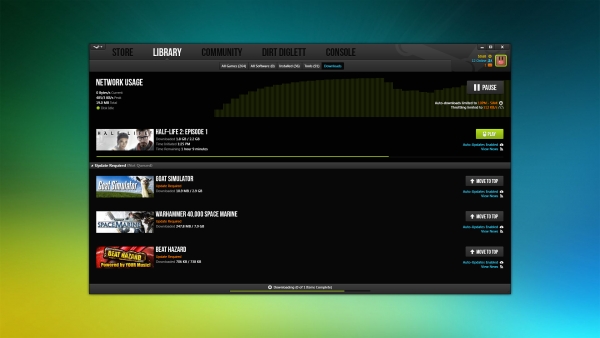
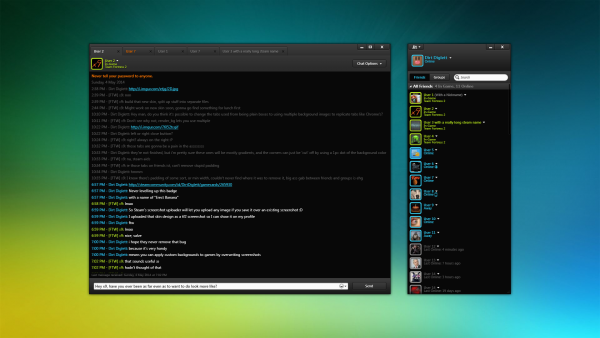
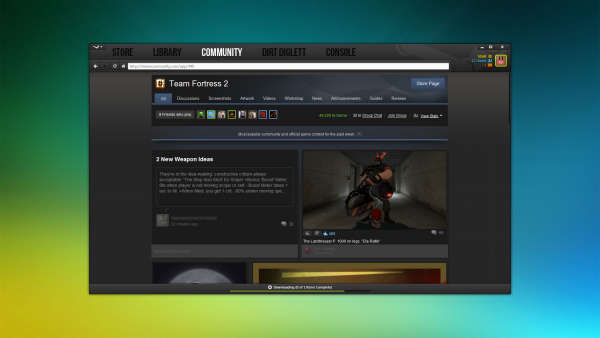
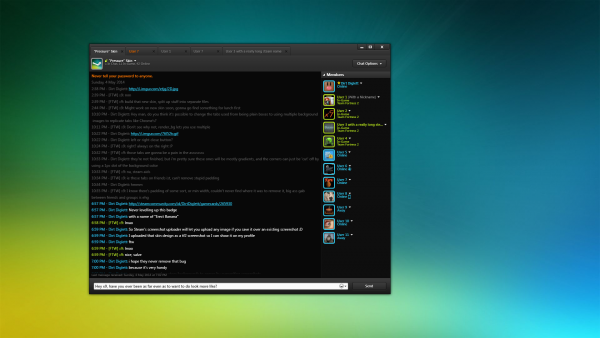
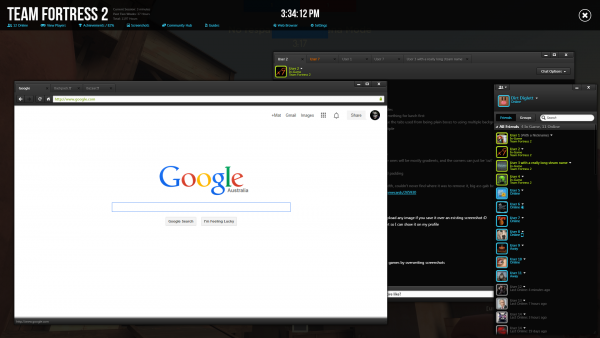
Just a quick post about a recent discovery I made about a awesome looking Steam UI theme called Pressure. I’ve never been a fan of the default Steam UI and have always been using the Metro skin as an alternative. Metro is a good improvement over the default skin, but still nothing crazy. Pressure, on the other hand, is a recreation of the Steam Client’s UI with a focus on clean look and function mixed with beauty.

I’ve started using Pressure and have fallen in love with it. By looking at these screenshots I think you can see why.

It is very easy to install. You must ensure that you are using the current BETA version of Steam. To install the skin simply extract the provided folder to your /Steam/skins directory, install the fonts in the fonts folder, then restart Steam. Select the skin from the Interface options of Steam and you’re finished!

What Steam skin would you recommend? Comment below!

Enable SNMP on ESXi 5.5

000174_2015-07-30 11_27

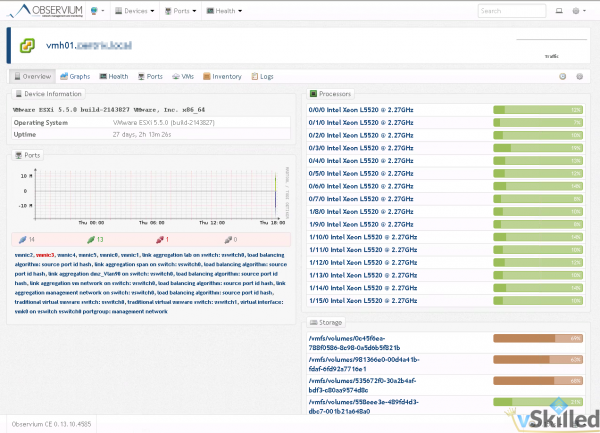
This is a quick guide on how to configure ESXi 5.5 hosts for SNMP monitoring. I use Observium to monitor and collect information about devices on my home network that support SNMP. This allows me to have an in-depth look at devices on my network as well as see metrics that go far into the past.

First we need to SSH to the ESXi host you would like to enable SNMP on. To do that we first need to make sure that SSH is enabled on the host.

Ensure that SSH is enabled on the ESXi Host:

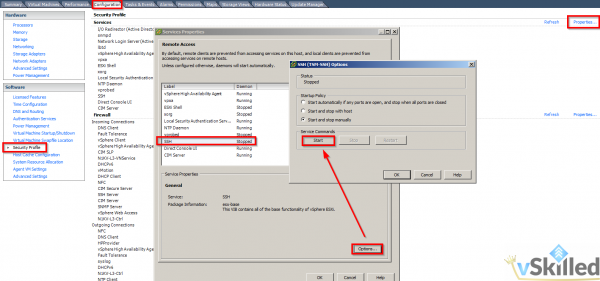
  1. Go to the configuration tab, then select Security Profile
  2. Select Properties with Services, then select SSH Server
  3. Click the Start button once to start the service for now

000175_2015-07-30 11_33

Using an SSH client, such as Putty, connect to your ESXi host. Then run the following commands:

esxcli system snmp set -c public
esxcli system snmp set -l warning
esxcli system snmp set -e yes

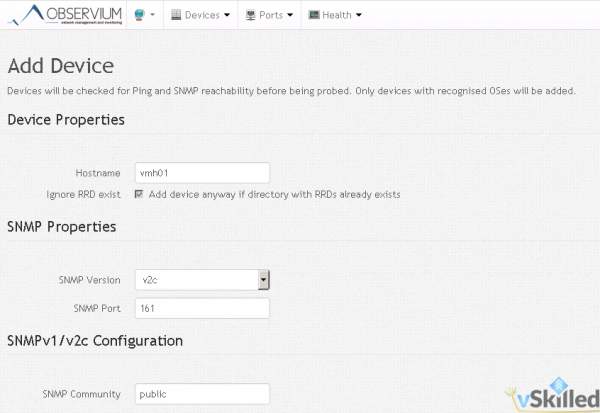
That’s it! You can change the “public” string to whatever your preferred community name is. Now you can disable SSH on the host if you prefer. Then add the host into your SNMP monitoring tool. Wait 5-10 minutes for discovery and your finished.

000173_2015-07-30 11_26

Storage Refresh 2016 – The Plan

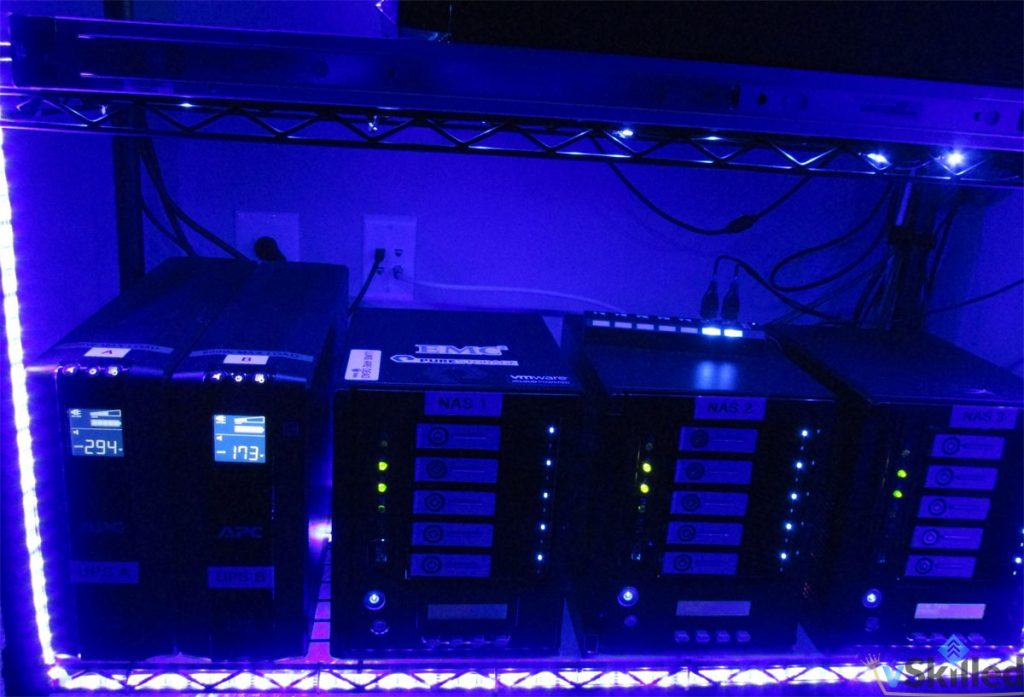
homelab-bottom

The time has come to increase storage capacity in the home lab. I expect that before the end of this year that I will have less than 1TB of free space left on my primary data NAS. That is a problem, and an expensive one at that. At the time of this writing I have 1.66TB of 7.21TB free (77% used). My data growth rate is currently between 3-5% on average per month. That gives me about 2-3 months before I’m in a critical state.

Adding storage to the primary data/media pools means also means adding storage to the backup pools. You won’t catch me without a backup – you only need to be burned by that once before you learn that harsh lesson. Seagate has come out with a 8TB drive meant for backups only which will help with backup capacity. Overall have been pretty skeptical of these 8TB drives. It is strongly advised not to use them in a RAID setup, they use SMR (shingled magnetic recording) that allows the tracks on the platter to be layered on top of each other to increase platter density or tracks per inch (TPI). With that said they seem to be fairly robust. While one could argue that I could (should?) delete some stuff, I strongly disagree. I am a data hoarder. Do you literally throw out all your books after you’re done reading them? Probably not. Same goes with data.

Upgrading the primary NAS means I’ll need to rebuild RAID arrays, use NAS 2 as “swing” storage, move data onto the upgraded NAS 1, rebuild NAS 2, and so on. This will take a couple of days of just moving data around and ensuring I have a backup at all times. During the swing process I am particularly vulnerable to drive failure. Currently my backup NAS 2 is in a JBOD configuration. If any one of the drives fail during this read/write intensive transfer process – game over. For that reason I will be making a second backup onto the 8TB seagate drive, just in case.

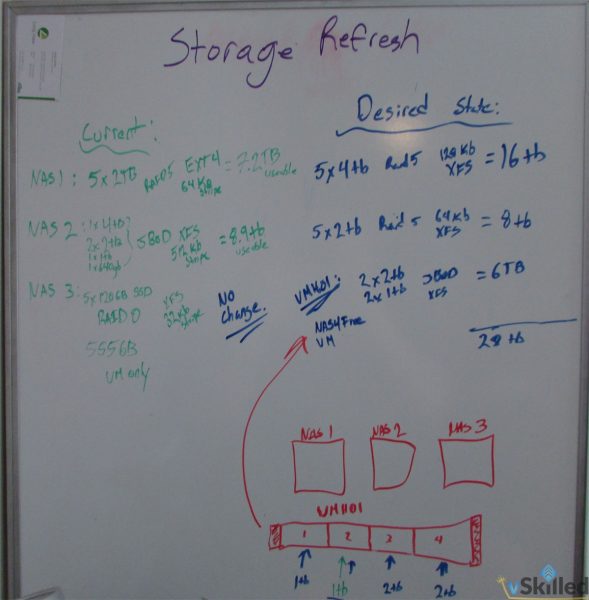
The plan is to switch NAS 1 into 5 x 4TB RAID 5, NAS 2 into what NAS 1 is currently (5 x 2TB RAID 5). I’ll then be leveraging my VMH01 (Dell C1100) for the backup pool drives (2 x 8TB, 2 x 2TB in JBOD) served up by a NAS4Free virtual machine. To help wrap my head around what I am doing I like to draw things out on my whiteboard. Here is my “draft” design. Apologies for the chicken scratch.

storagerefresh2016-draft

I’ll be re-purposing an existing 4TB drive in NAS 2 and moving it into the NAS 1 raid pool (hence why only purchasing 4 x 4TB drives as seen below). This saves me the cost of buying another 4TB drive.

I will be using a multi-vendor setup using a mix of Seagate and Western Digital drives. That will make things a little more robust in the long term. Currently I just have desktop rated drives in the primary NAS which, by manufacture guidelines, are only rated for a maximum of 2 in RAID 1/0 and they are also only rated for 8×5 use. The WD Red and Seagate NAS series drives are designed for use in home NAS and servers. They offer a good price to performance ratio, and possess a few features which make them more suitable for RAID arrays such as TLER, higher vibration tolerance (which should result in a longer lifespan), consume less power and are rated for 24/7 use.

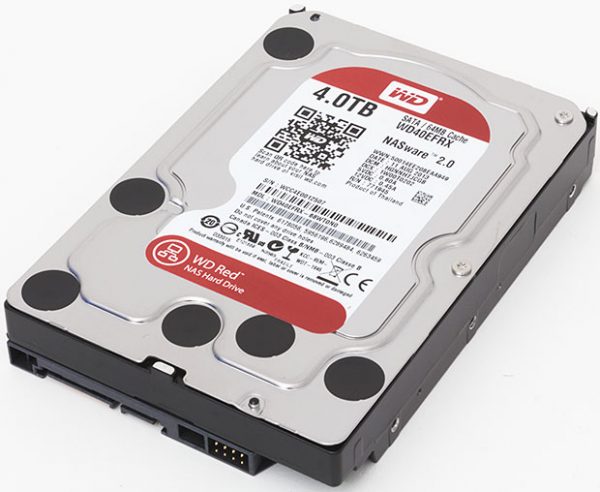
western-digital-red-4tb

DriveQuantityCost (CAD)
Seagate ST8000AS0002 8TB 5900RPM 128MB Cache SATA3 Archive Hard Drive OEM - for Backup Data Only2 x $319.99 ea$319.99
Western Digital WD WD40EFRX 4TB Red SATA3 6GB/S Cache 64MB 3.5in Hard Drive2 x $209.99 ea$419.98
Seagate ST4000VN000 4TB 64MB SATA 6GB/S 3.5IN Internal NAS Hard Drive2 x $199.99 ea$399.98
$1,459.94

All said and done I will end up with two large data/media storage pools with 22TB~ of usable combined storage.

A considerably large increase from my existing data capacity of only 7.21TB. The idea being for this to last at least 3+ years. NAS 2 which is currently a JBOD for backups only will now be another usable RAID5 protected data pool. Each NAS backed up to VMH01’s backup storage JBOD.

DeviceCurrent Drive LayoutCurrent CapacityDesired Drive LayoutDesired Capacity
NAS 1 (Thecus N5550)5 x 2TB (RAID 5)7.21TB5 x 4TB (RAID 5)16TB~
NAS 2 (Thecus N5550)1x4TB, 2x2TB, 1x1TB, 1x640GB (JBOD)8.9TB5 x 2TB (RAID 5)7.25TB~
VMH01 (Dell C1100)1 x 1TB1TB2 x 8TB, 2 x 2TB (JBOD)20TB~

I’ll be sure to post updates with pictures on the build and upgrade process when the time comes. For now I’ll be trying to saving up some cash to make this plan come together.