Windows Server 2016 – Technical Preview 5

Install

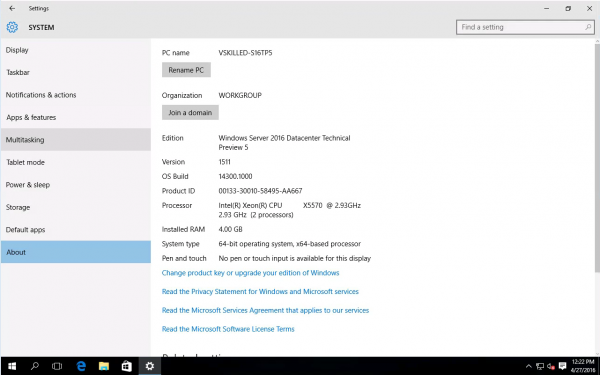
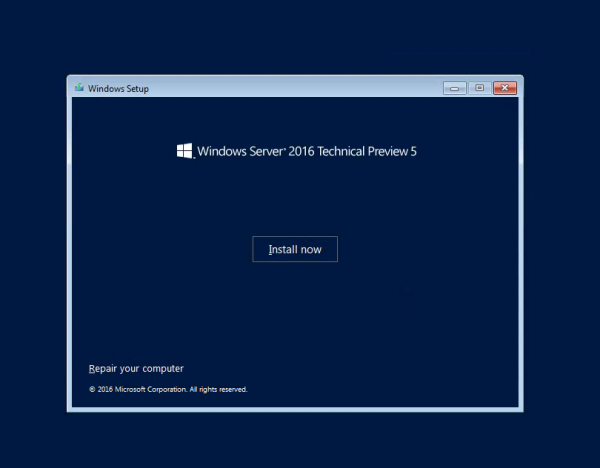
Microsoft has released Windows Server 2016 Technical Preview 5 (build #14300). You can see what’s new here. This could probably be one of the last few TP (tech preview) builds that we will see. Especially so if Microsoft is still firm on their plans to officially launch Windows Server 2016 this summer (Q3 2016).

As long as you are running VMware ESXi 5.5 or higher (6.0 or later is recommended) then Windows Server 2016 is an supported operating system on VMware. You can even select it as an option for the guest OS on virtual machine version 11 or higher. Keep in mind that VMware VM version 11 restricts you to using the web client ONLY. When moving from a previous version of Windows Server to Windows Server 2016 Technical Preview 5, you will need to uninstall the previous version for a clean installation of Technical Preview 5. You can download TP5 as an ISO, however Nano server is only available in VHD format. See Getting Started with Nano Server for full details.

Personally I was never a fan of Windows 8.x or Server 2012. So far I think that Windows Server 2016 is already step in a better direction. Even in technical preview it offers many improvements of it’s predecessor. Windows Server 2016 Technical Preview 5 provides a wide range of new and enhanced features and capabilities spanning server virtualization, storage, software-defined networking, server management and automation, web and application platform, access and information protection, virtual desktop infrastructure, and more. The GUI version or what is now referred to by Microsoft as the “Desktop Experience” is my current de-facto standard. If you use or have seen Windows 10 then right out of the box you will notice that Server 2016 is a stripped down, optimized, server version of Windows 10.

Choose Standard or Datacenter edition, depending on the features you need:

  • Windows Server 2016 Standard
    • Up to 2 VM’s or Hyper-V containers
    • Unlimited Windows containers
    • New Nano Server deployment option for “just enough OS”
  • Windows Server 2016 Datacenter
    • Unlimited VM’s and Hyper-V containers
    • Unlimited Windows containers
    • New Nano Server deployment option for “just enough OS”
    • Shielded VM’s and Host Guardian Service
    • Storage features, including Storage Spaces Direct and Storage Replica
    • New networking stack

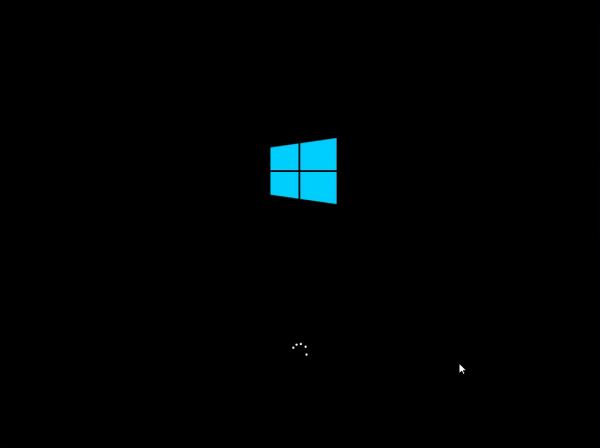
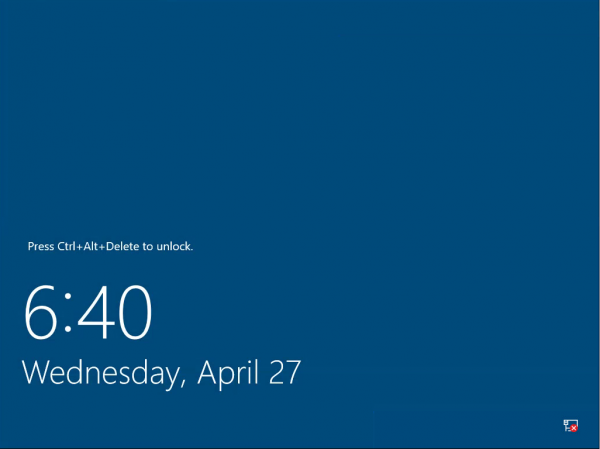
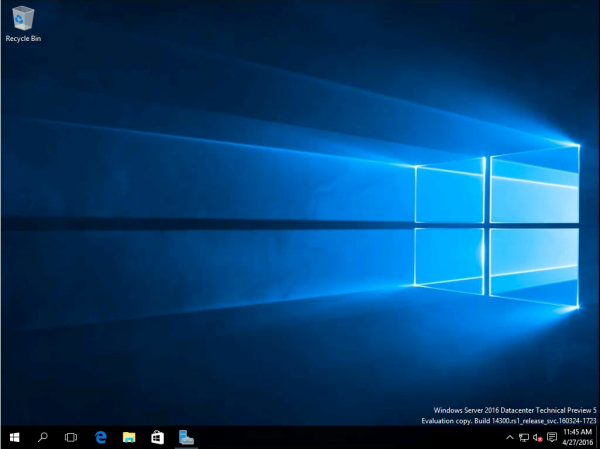
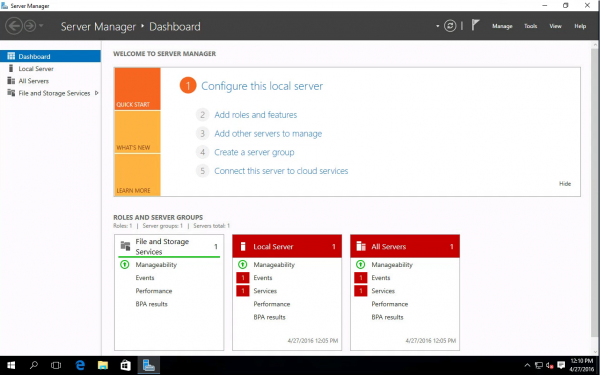
Windows Server 2016 Technical Preview 5 Gallery:

Overall Technical Preview 5’s new features seem to be focused on Hyper-V, Networking, Storage, Nano Server and Security. In Server 2016 you will also find Windows Defender and “Windows Server Antimalware” is installed and enabled by default.

The introduction of Host Guardian Service (HGS)’s new feature Shielded Virtual Machines which focuses on the security of virtual machines running in the Hyper-V environment. The goal of shielded VMs and Guarded Fabric is to help provide service providers and cloud operators the ability to offer their tenant administrators a hosted environment where protection of tenant virtual machine data is strengthened against threats from compromised storage, network, and host administrators, as well as malware.

This is just a quick post showcasing the new tech preview build. I will have a more in-depth view of all of these features and more when a release candidate build is finally available.

What do you think of Windows Server 2016 so far? Comment below!

vSkilled Crypto – Now SSL Encrypted!

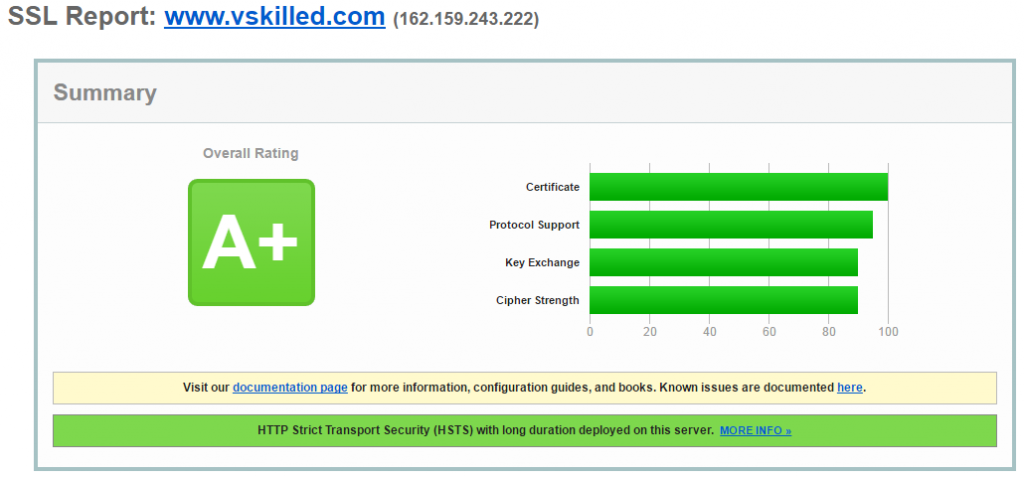
vSkilled is now fully SSL encrypted and including HTTP Strict Transport Security (HSTS).  Since vSkilled is a technical IT blog, one would expect to think that the communication between the client and server aught be encrypted. Now that traffic has picked up on the site I decided to move things over to SSL.

cf_ssl

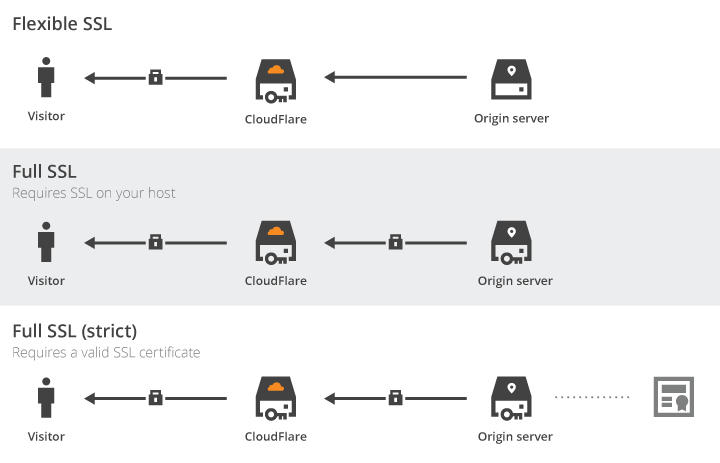
vSkilled uses CloudFlare as our CDN so that complicates things slightly when using SSL. We’re using the Full SSL (Strict) model which encrypts the connection between you and CloudFlare, and from CloudFlare to vSkilled’s web servers.

000346_2016-05-18 15_18


Enjoy!


Home Labs: Remote Access and Security

I am sure that most who have a lab environment in their home also have a way of remotely accessing it – either from at work, with friends or family, vacation, etc. The problem with any remote access into a secure network is that you are quite literally punching a hole into your network from a security sense to allow that to happen.

People seem to have a lot of mixed feelings about allowing Remote Desktop Protocol (RDP) into their home network from the Internet. As a general blanket statement without context, I would completely agree. Opening RDP (port 3389) directly to the Internet without any other security measures in place is asking for trouble. The default RDP port will be constantly brute forced, port scanned, exploited, and the list goes on.

With that said there are steps you can take to have secure remote access to your home network using RDP, SSH, etc.

Many of these concerns can be minimized or eliminated using some of these best practices:

  1. Restrict access using firewalls
  2. Change the listening port for Remote Desktop Protocol
  3. Use two-factor authentication
  4. Use strong passwords
  5. Set an account lockout policy

1 – Restrict access using firewalls

Having a proper firewall and firewall rules in place is critical for protecting your network from outside threats. And I’m not talking about the built-in firewall on your ISP’s provided/rented crappy router/modem – these are a very poor excuse and implementation of a “firewall”- not to mention your ISP normally hard codes back-doors and default logins. I’m talking about a real firewall either physical or virtual, for example; Cisco ASA, Cisco Meraki, Untangle, PF Sense, Sophos UTM/XGUbiquiti, etc. Any of these will give you the tools required to properly firewall your home network. All of these firewalls will require a ‘geek’ to properly setup – keep in mind this article is targeted to home lab hobbyists.

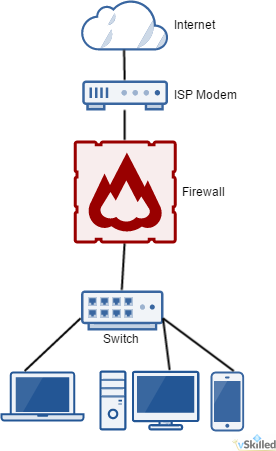
basic_networkTo the right is a good example of a very basic home network with a firewall. Anything before the firewall we treat as untrusted. The firewall is literally the barrier between your network and the big, bad, Internet. There you will define your firewall rules to allow remote access and other functionality (or lack-thereof).
Personally, I use Sophos UTM (see my homelab) with a DNAT (Destination Network Address Translation) rule to redirect the external facing remote access port to a specific server and port on my internal network. This allows me to create a matching condition (For traffic from, Using service/port, Going to) to apply an action (Change the destination to, And the service to) to define what happens when something wants to connect to my network. Using that logic I can (and do) restrict the IP blocks allowed to connect to my remote access port, what times of day, etc.

This allows me to both A; define a custom externally facing port without having to change the port on the server internally, and B; create firewall rules to restrict access even further from specific traffic sources, destinations and services.

The real-world implementation of this will vary based on your choice of firewall, your skills and personal preferences.

2 – Change the listening port for Remote Desktop Protocol

Changing the listening port of RDP is a quick and easy method of implementing security through obscurity. Doing so will help to hide your RDP port from threats who scan networks looking for computers listening on the default Remote Desktop port (TCP 3389).

There are a number of ways to accomplish this. 1 – port redirection on your firewall/router, 2 – modifying the registry keys of the Windows computer locally, or 3 – using a Windows TS Gateway. Choose the method that works best for you.

3 – Use two-factor authentication

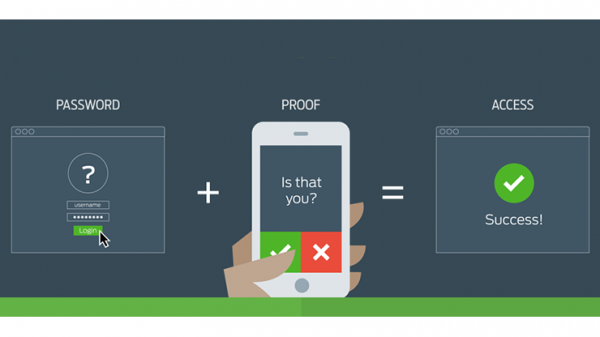
Using 2FA (two-factor authentication) is a no brainier these days. Two-factor authentication provides a second layer of security to any type of login, requiring extra information or a physical device to log in, in addition to your password. This protects user logins from remote attacks that may exploit stolen credentials.DuoScreen_740
I use Duo Security Personal edition on my remote RDP access to my home environment. I have configured Duo to only prompt 2FA if the source IP is external. That way I don’t need to use 2FA for local RDP sessions from within my LAN – which would just be annoying. Any time I want to login I just connect, enter my credentials, answer the 2FA prompt on my phone, and I’m in. The Duo Dashboard also has a wide range options, logging, and device fingerprinting. Duo works on a huge number of operating systems and platforms so you can integrate it into, almost, literally any part of your network as you deem fit.

If you are not already using 2FA in your network, start using it! It’s free and extremely easy to setup.

4 – Use strong passwords

While this one may seem like common sense, you would be surprised. A strong password should be at least 8 characters long using a combination of upper and lower case characters – including a mix of both numbers and symbols. Setting an insecure password on anything, let alone a remote entry point to your network could spell disaster.

One of the best ways to ensure that you use unique and strong passwords for systems and websites is to use a password manager. I personally use and recommend Dashlane.

5 – Set an account lockout policy

Brute force attacks are common problem for external facing ports and services. Remember that two-factor authentication only comes into effect once the password is correctly entered and will not prevent a brute force attack. Setting your computer to lock an account for a period of time after a number of incorrect guesses will help prevent attackers from using automated password guessing tools to break into your account.

  • Go to Start–> Programs –>Administrative Tools–> Local Security Policy
  • Under Account Policies –>Account Lockout Policies, set values for all three options.
    • 3 invalid attempts with 3 minute lockout durations are reasonable choices.

Conclusion

Hopefully these tips can help you to increase the security of your home network and remote access methods. If you know what you are doing and if done correctly you can have secure remote entry into your home network. This is not meant to be a be-all-end-all guide as there is no one size fits all for network security. This guide doesn’t even begin to dive into the more complex aspects of network security such as advanced threat protection, intrusion prevention, spoof & protocol protection, and so on.

Have more home lab security tips to share? Post them in the comments below!

Worried about Windows 10 privacy issues? Group/Local policy to the rescue!

win10privacy

I hear and see all over the Internet that people have privacy concerns about Windows 10 and for good reason. For any security concious person, like myself, they’re probably not very happy about many of the decisions that were made for Windows 10. Microsoft seems to be very tight lipped about their updates and what information is actually shared in their “learning” and “telemetry” information that is sent back to the Microsoft mother ship. There are also many other features included in Windows 10 that are, or could be seen as, a privacy concern; such as the advertising ID, WiFi Sense, Cortana, and the list goes on…

One of the biggest worries, though, is Microsoft’s policy on disclosing or sharing your personal information. The following is an excerpt from the privacy policy:

“We will access, disclose and preserve personal data, including your content (such as the content of your emails, other private communications or files in private folders), when we have a good faith belief that doing so is necessary to protect our customers or enforce the terms governing the use of the services.”

I’m sure many from the IT community are aware of Microsoft’s direct involvement with Government spying programs – so make no mistake, you are being watched. Continue reading…

vExpert 2016

vmware_hyk

I am very honoured to be selected as a vExpert 2016 by VMware. Getting recognition is awesome but knowing that you are sharing content that is for the benefit of others is even better.

The annual VMware vExpert title is given to individuals who have significantly contributed to the community of VMware users over the past year. The title is awarded to individuals (not employers) for their commitment to sharing their knowledge and passion for VMware technology above and beyond their job requirements.

vExpert’s benefits and activities receive:

  • vExpert certificate
  • Permission to use the vExpert logo on cards, website, etc for one year
  • Access to a private directory for networking, etc.
  • Exclusive gifts from various VMware partners
  • Access to private betas (subject to admission by beta teams)
  • 365-day eval licenses for most products
  • Private pre-launch briefings
  • Private briefings from tier 1 alliance partners
  • Blogger early access program for vSphere and some other products
  • Featured in a public vExpert online directory
  • Access to vetted VMware & Virtualization content for your social channels.

I give thanks to the other vExperts and the VMware social media & community team for their hard work and dedication.

The full list of the 2016 vExperts can be found here.

VMW-LOGO-vEXPERT-2016-k

Whoops! My Samsung 950 PRO M.2 512GB SSD experience

Samsung-950-Pro-SS

This story is a bit of a sad story. Mainly due to the failure of my own personal oversight over a very important specification requirement and snowballed by my online shopping addiction.

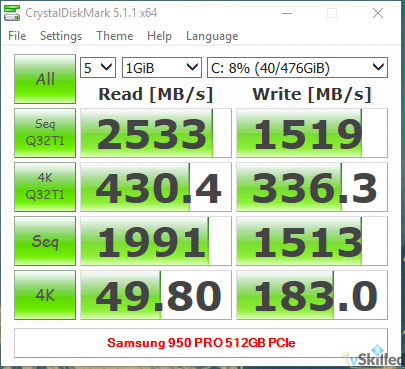
For a little back story – I had been reading great reviews all over the internet about Samsung’s new 950 PRO 512GB M.2 NVMe SSD drive having amazing benchmark speeds. This drive features cutting-edge V-NAND-based NVMe SSD supports PCI Express Gen 3 x4 lanes, providing a higher bandwidth and lower latency to process a massive amount more data than SATA SSDs. It outperforms SATA SSDs by over 4.5 times in sequential read and by over 2.5 times in sequential write, delivering the speeds of 2,500 MB/s read and 1,500 MB/s write respectively. I have never purchased or used a M.2 drive before, so this would be me venturing into a bit of an unknown territory.

I wanted to get my hands on one of these really badly! I knew my motherboard (Gigabyte X99 G1) had a M.2 slot so I checked the website to confirm and at a glance everything appeared to be right… So I pulled the trigger and purchased it. Patiently waited 2 weeks for it to arrive. Finally, I was able to install the drive after some frustration with BIOS settings and drivers. But something wasn’t right… I was concerned as to why I was getting a little under half of the speed other people were getting on their benchmarks. What gives?

Well… lets take a closer look at my mother board specifications again. It is the Gigabyte X99 G1:

000250_2016-01-22 09_17

See that..!? Notice the “PCIe x2/x1“? The Samsung 950 PRO 512GB is a PCIe 3.0 x4. So that means that on my motherboard the M.2 drive is operating at literally under half the bandwidth that it’s capable of running at. Only at this point, having the drive purchased and installed, did I realize that there is a major difference between “M.2”  and “Ultra M.2” which also known as PCIe 3.0 x4 which supports up to 32 Gb/s (4 GB/s) compared to PCIe 2.0 x2 which would only support 8 Gb/s (1 GB/s).

nooooooooo

That means for a M.2 drive using PCI-E 2.0 x2, it only has a 25% potential speed increase over SATA III. Not exactly what I was going for considering the $329 USD price I paid. This means for me to be able to use the drive at full speed I will need to find a motherboard with a LGA2011-v3 CPU socket and a Ultra M.2 socket. A harsh lesson to learn and a fix I will have to put off for some time. Luckily I may be able to just get a M.2 x4 to PCIe adapter to fix this problem.

In the end I can only laugh at myself as a technical professional to make a mistake like this – but hey this is my story and hopefully it may help you avoid making the same mistake. Check to ensure your motherboard’s M.2 interface version supports PCIe 3.0 x4  NVMe 1.1!


Update 1/28/2016:

Fixed! Thanks to the $30(CAD)  Addonics ADM2PX4 M2 PCIe SSD to PCIe 3.0 4 Lane Adapter.

2016-01-28 16_48_52

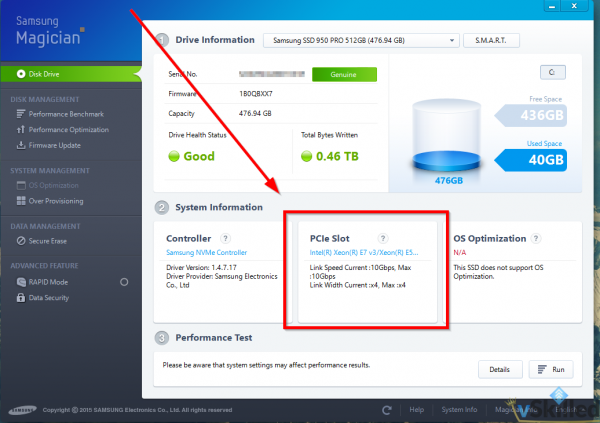
The Samsung Magician software is also showing that I am using all four lanes, instead of just two!

2016-01-28 17_02_32

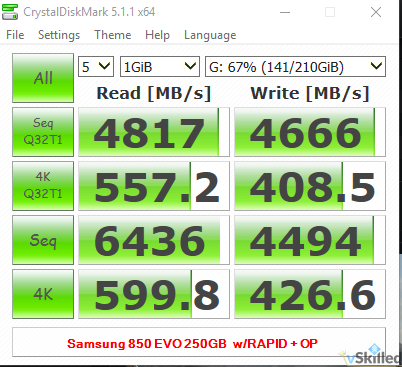
Here’s a bonus benchmark of another Samsung drive I have with RAPID mode (RAM cache) enabled. :O
2016-01-28 16_42_33


Do you have a story to tell about your M.2 drive experences? Let me know in the comments below!